Origami Robot - Feel waves with your palm.
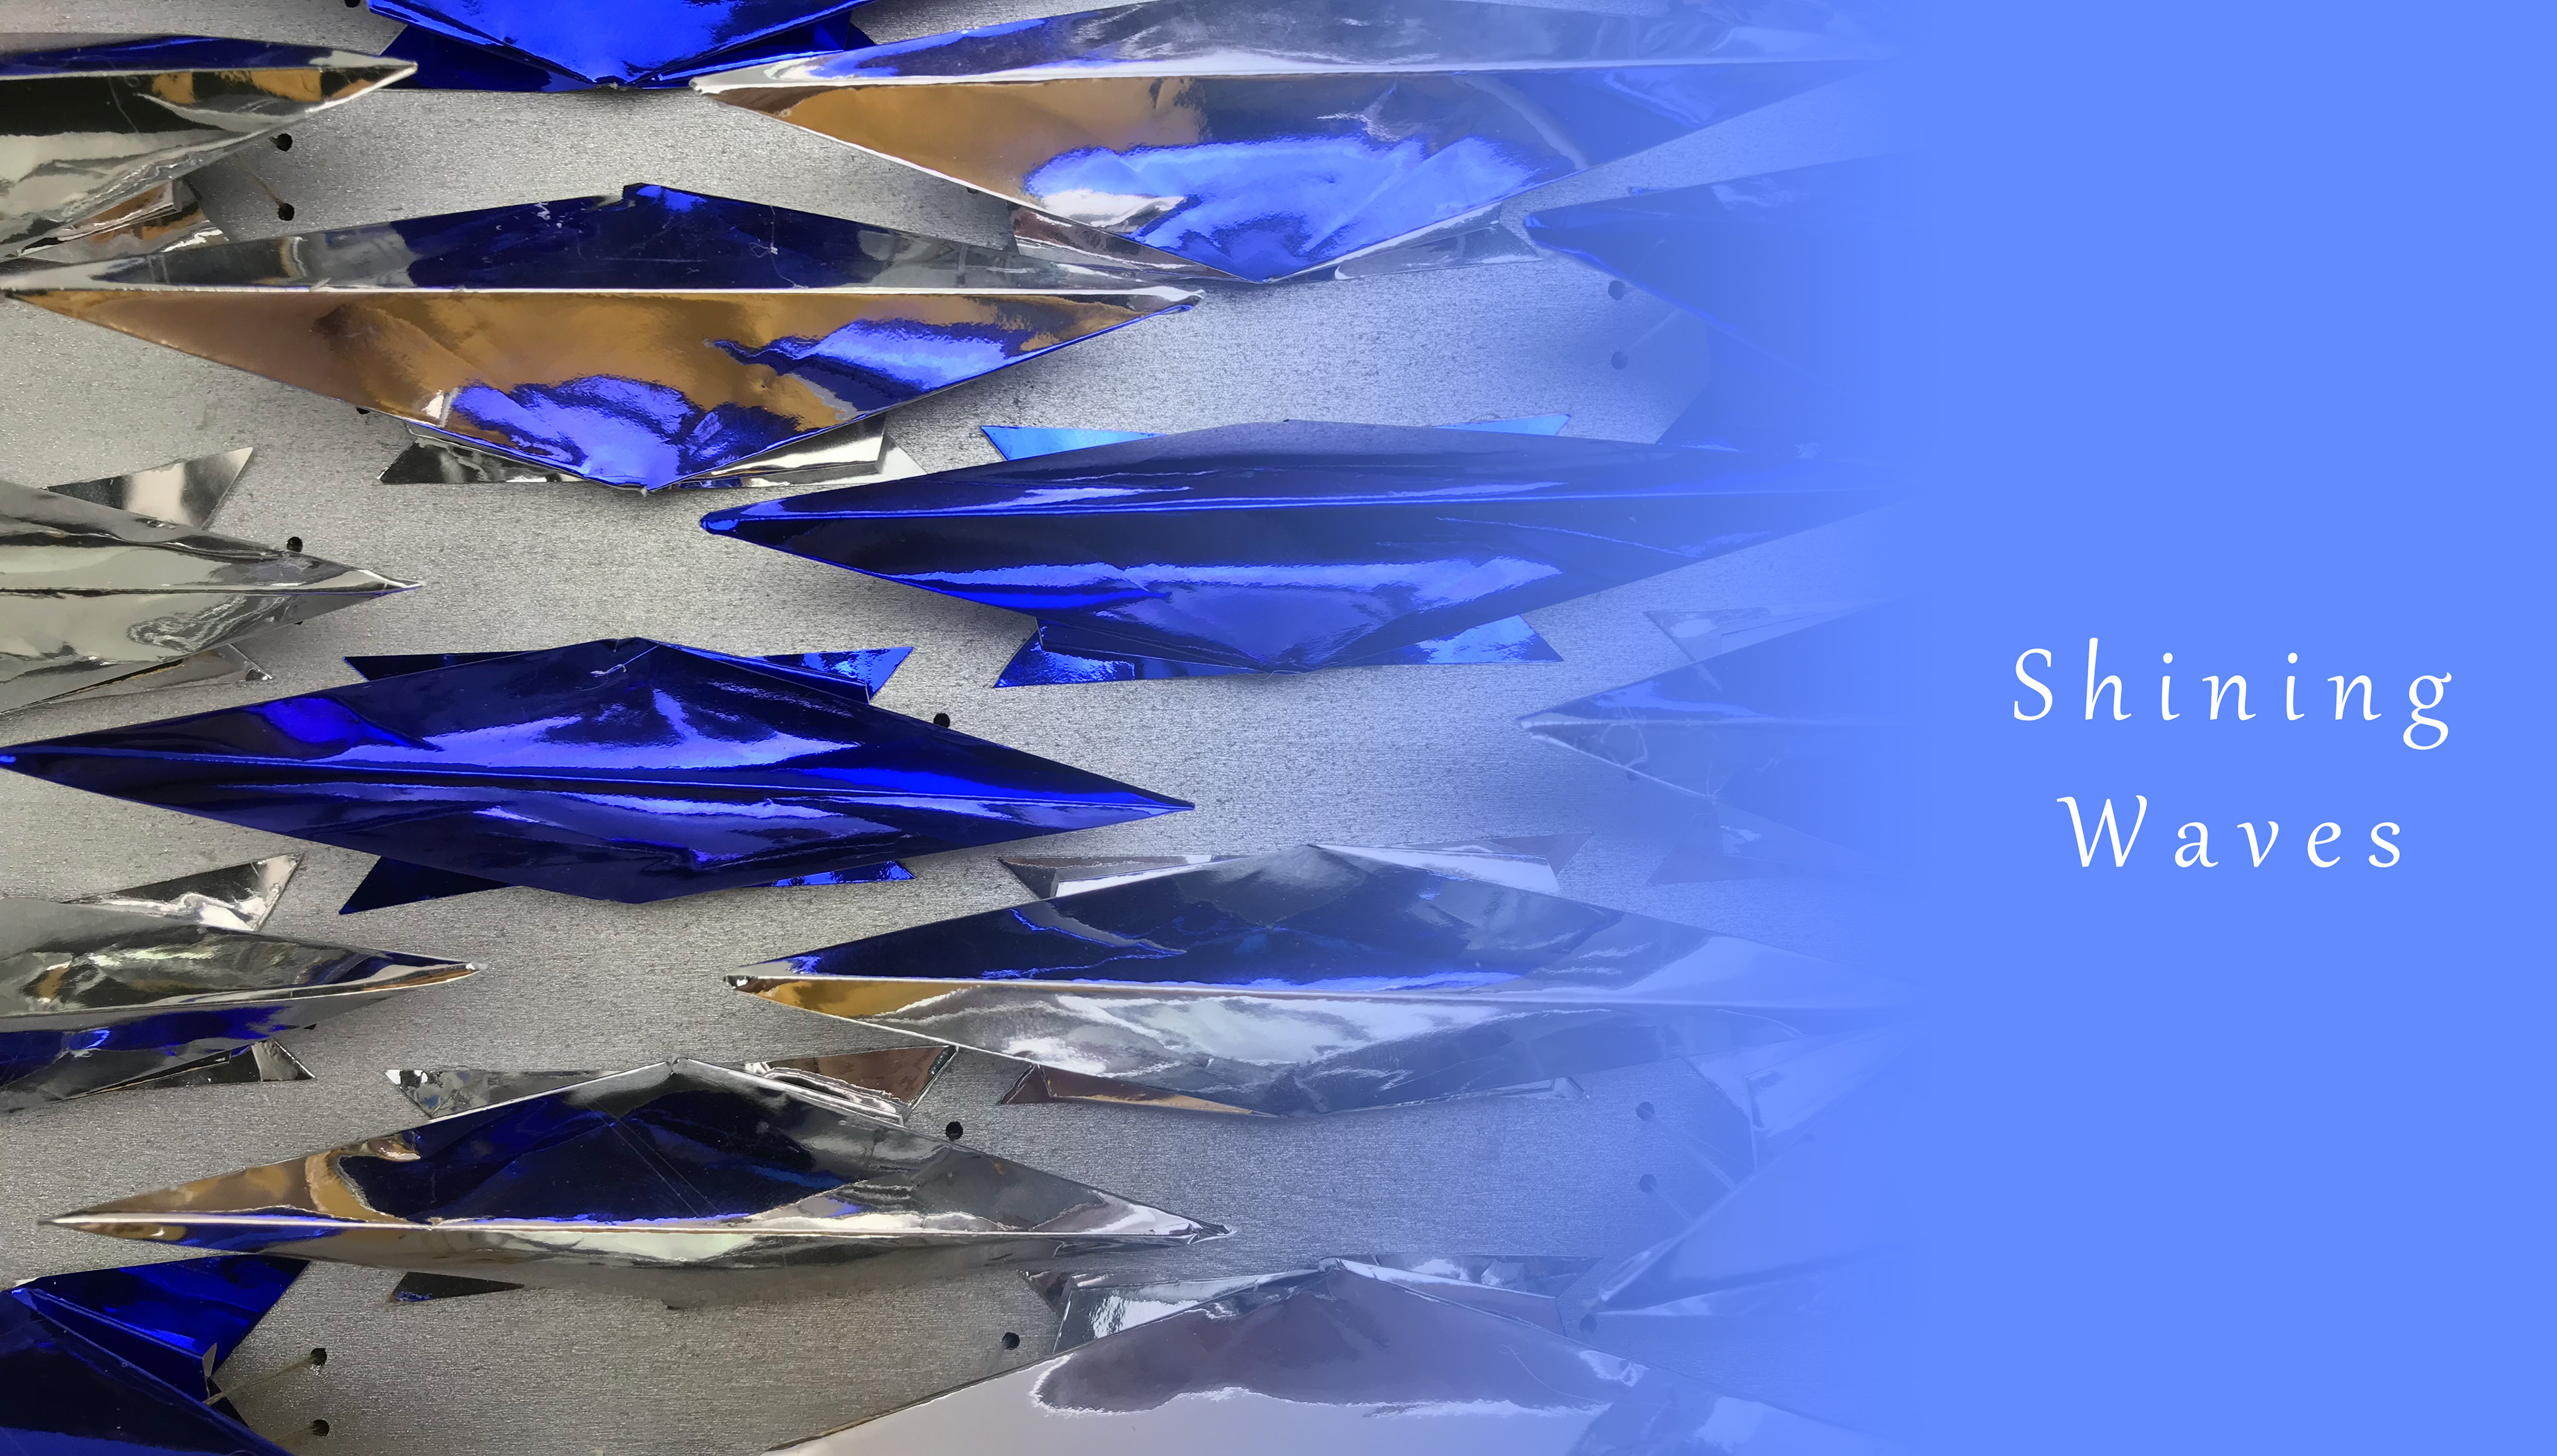
Shining Waves
An interactive device that combines origami and Arduino.
1. Design Introduction
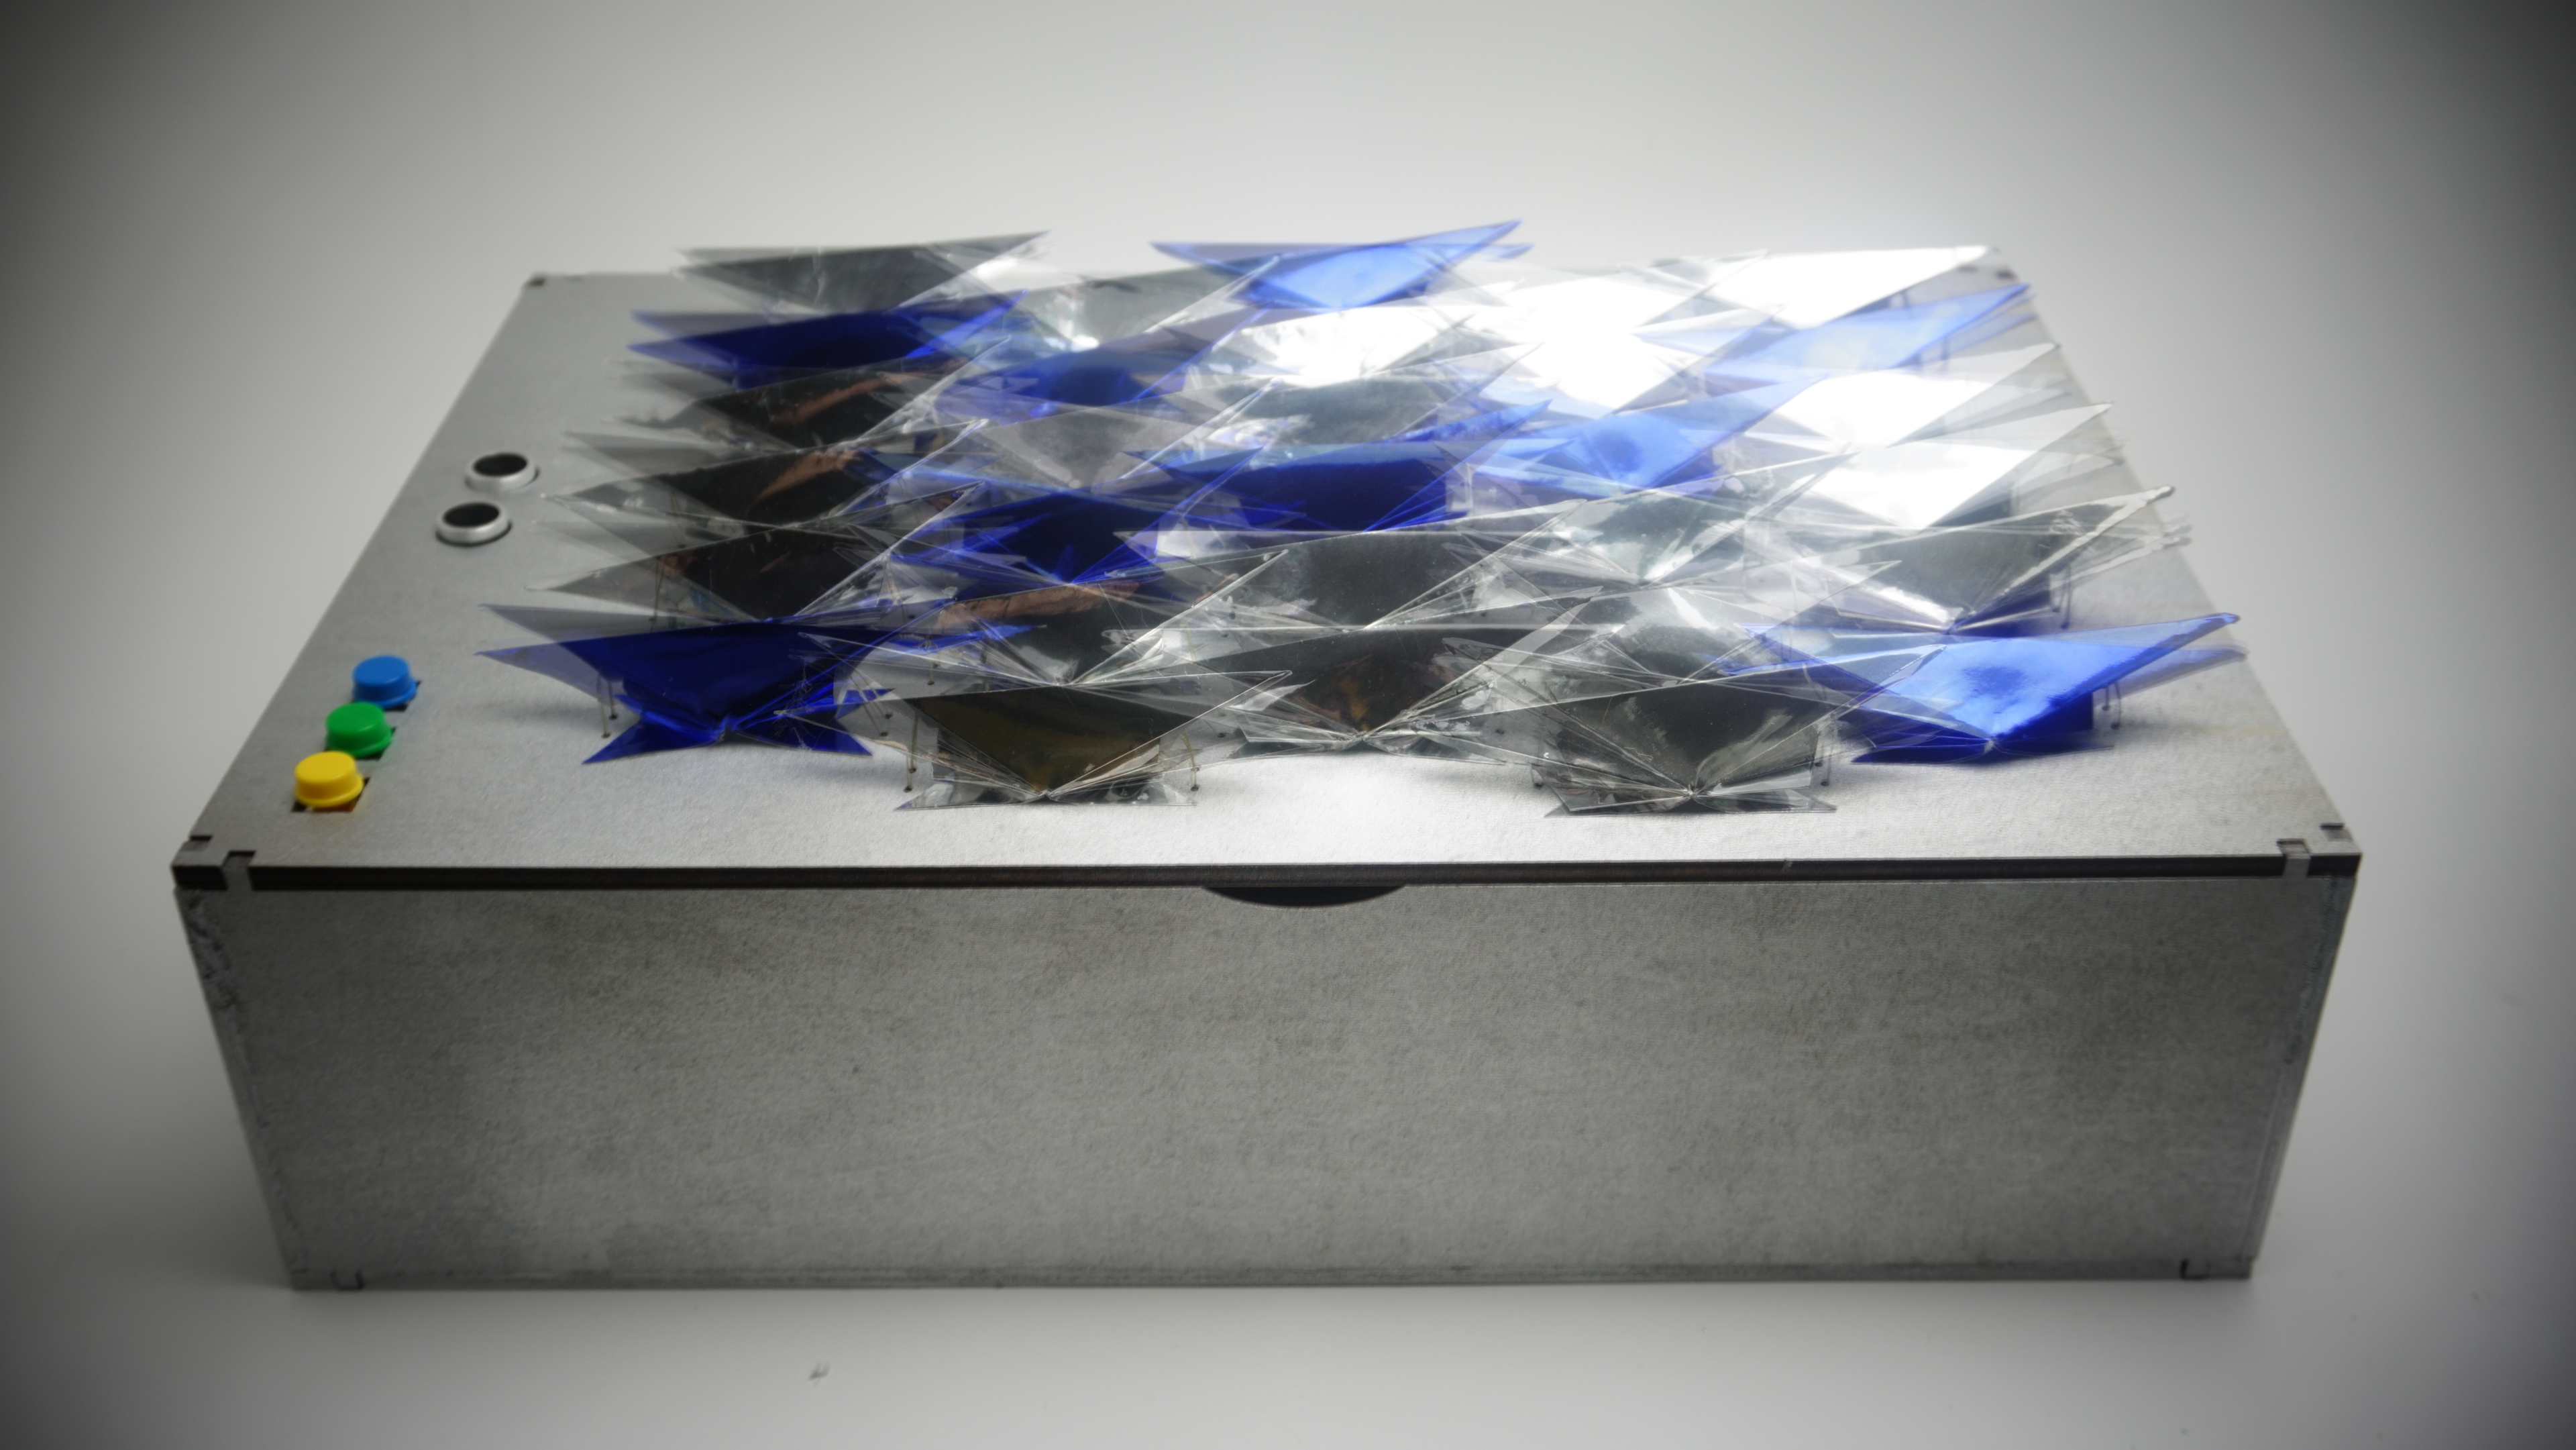
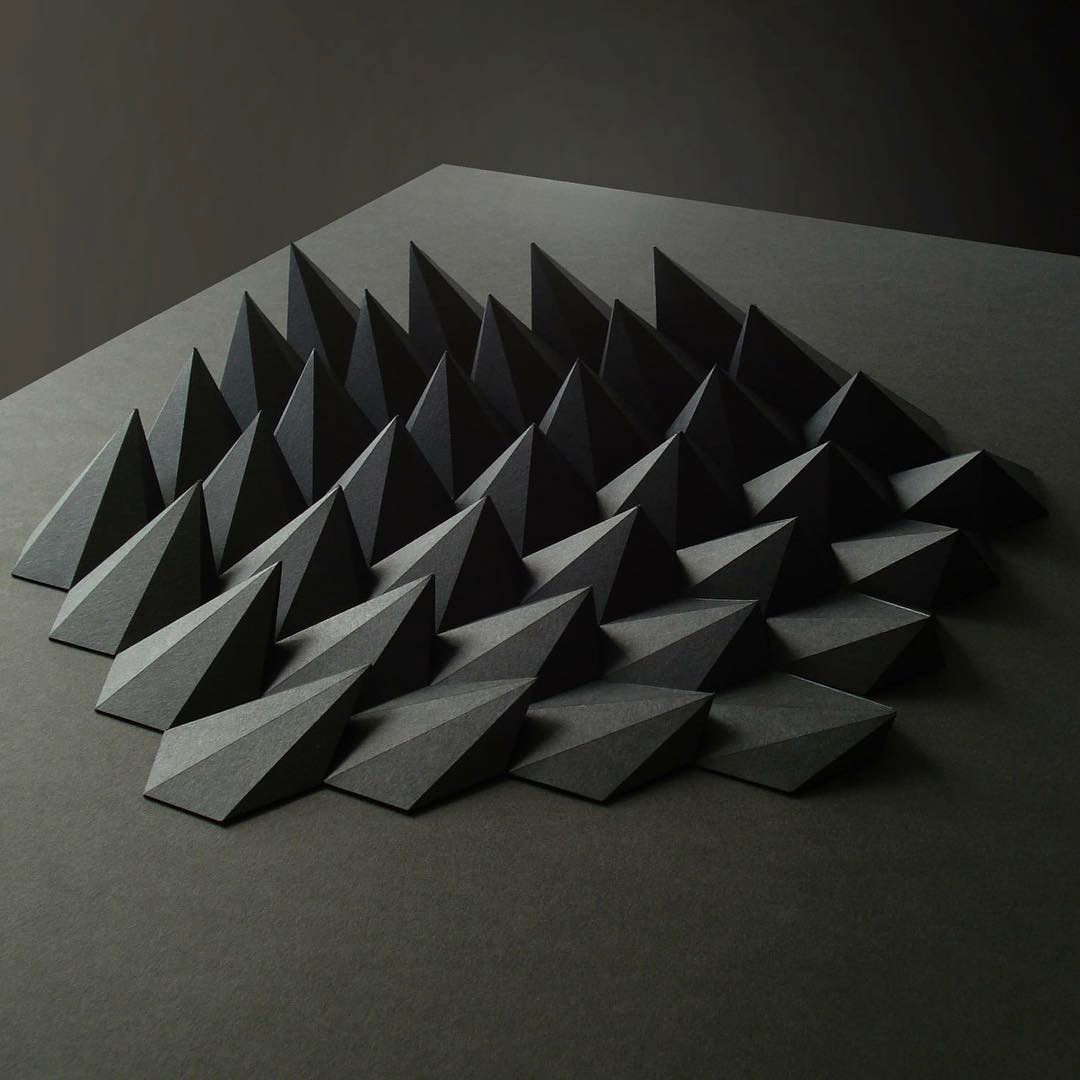
Shining Waves is an interactive device that senses distance. As palms are getting closer and closer to it, its waves swing and reflect the deep blue light like a gentle wave.
The main features and details of Shining Waves are:
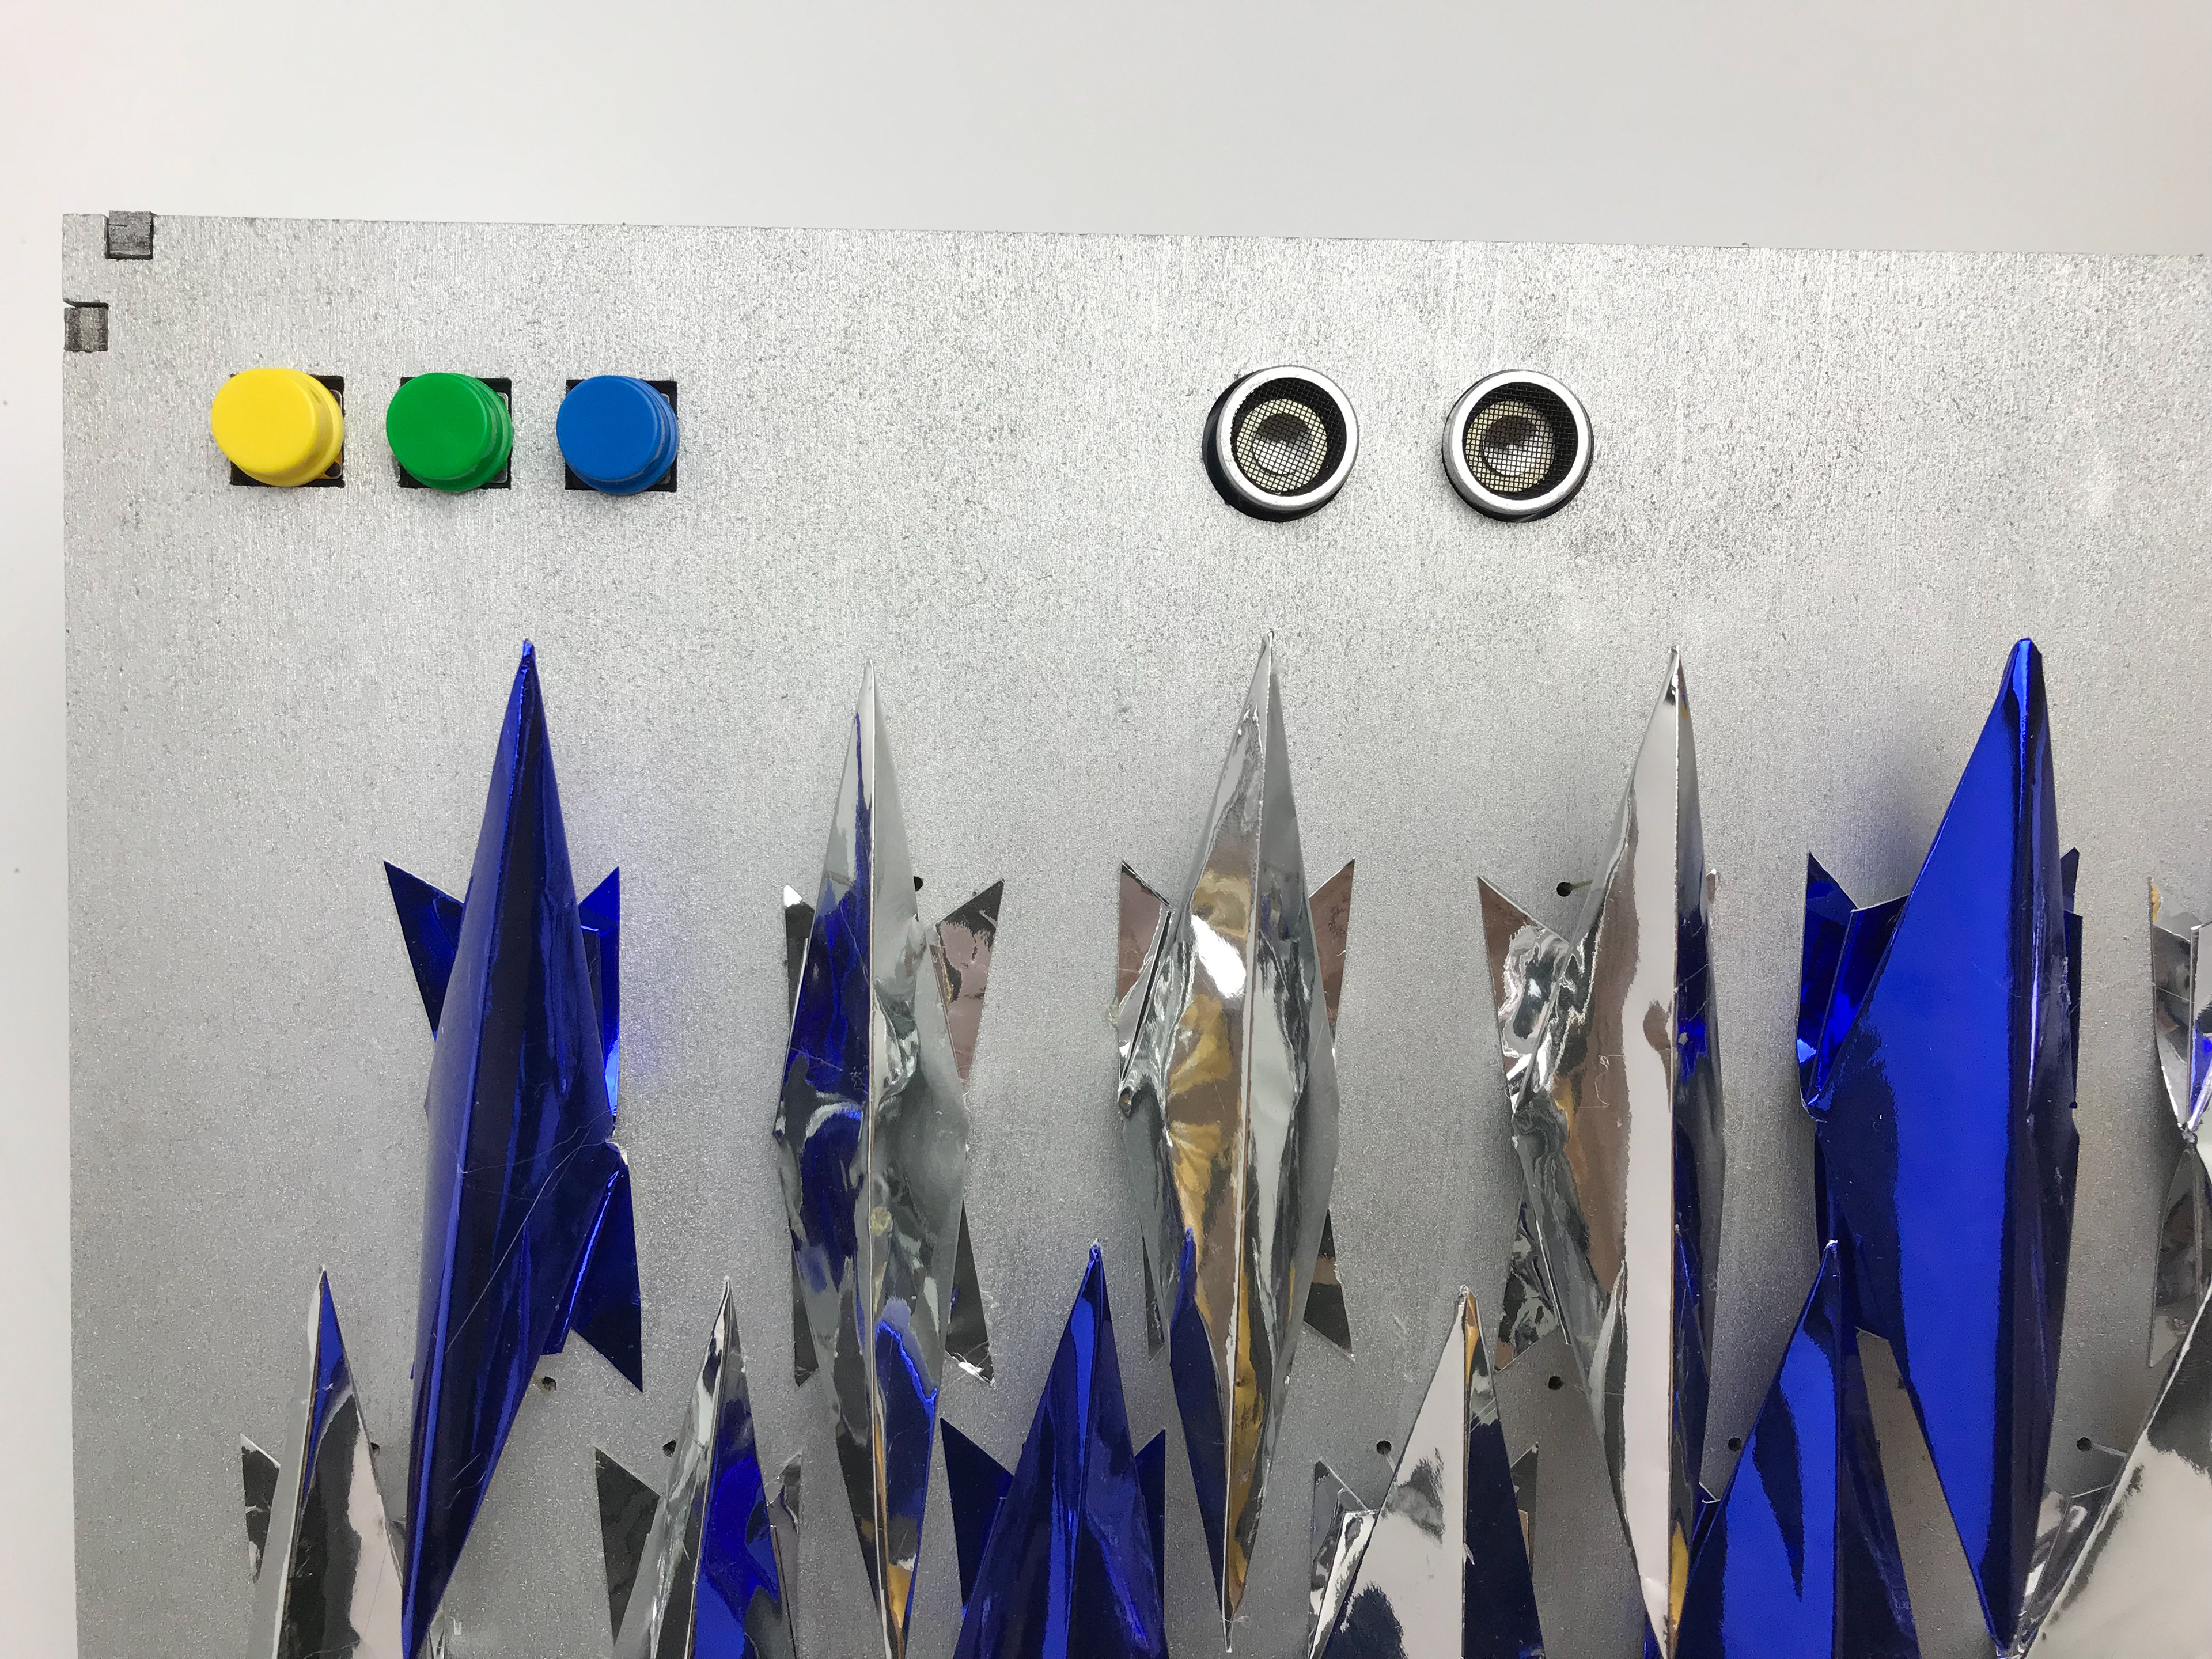
1) The three buttons on one side represent three modes: swing 90 degrees to the left, swing 90 degrees to the left and right, and swing 90 degrees to the right. Press each button and waves will move accordingly.
2) An ultrasonic distance sensor is installed in the middle to detect the distance between palms and Shining Waves and transmit the data to waves, thereby changing the speed of the movement of waves. The closer the distance is, the faster the waves move, achieving the purpose of controlling the movement rate by palms.
3) When waves swing, it will reflect the light. And it continues to rise and fall with the movement to create the effect of the waves.
4) On the diagonal line from lower left corner to the upper right corner, the height of the waves is sequentially lowered, and the width is increased in order to form a gradient from slenderness to fullness to create the effect of the waves.
2. Inspiration
The appearance of waves are originally inspired by the thorns of animals. As geometric units, the thorns of different animals have different height and width, like a layer of defensive appearance, so we borrowed the shape of the thorn to design the first monomer.
Since the movement of this unit is unidirectional, the structure has some instability, and after that, we associate the same effect with the waves, so the unit is transformed into a bilaterally symmetric wave unit. At the same time, we chose the blue and silver reflective paper, and apply the lighting simulation effect.
3. Design Process
3.1 Structure of origami unit
We chose geometry as the subject to innovate. In order to simulate the effect of animal thorns, we made the first attempt on the structure of the origami unit.
The first unit is an unidirectional animal thorn structure with a crease bulge on the top and a two-fold crease on the one-sided bottom to achieve the vertical expansion of the unit.
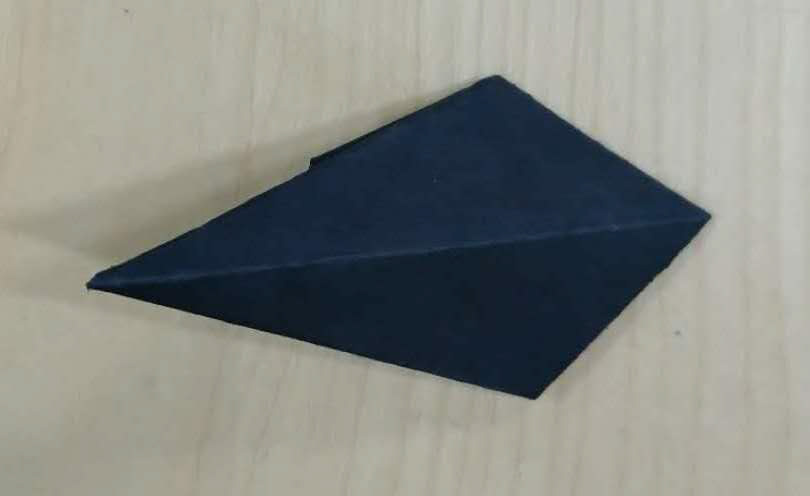
Then considering the instability of the structure and the ineffectiveness of the other end of the unit, we made improvement. We changed the unit to a wave with four corners and double swings wave structure with a basic shape of geometric elements: a bilaterally symmetric irregular quadrilateral.
At the same time, the original movement mode is retained, and this movement mode is applied in both directions.
3.2 The mode of motion
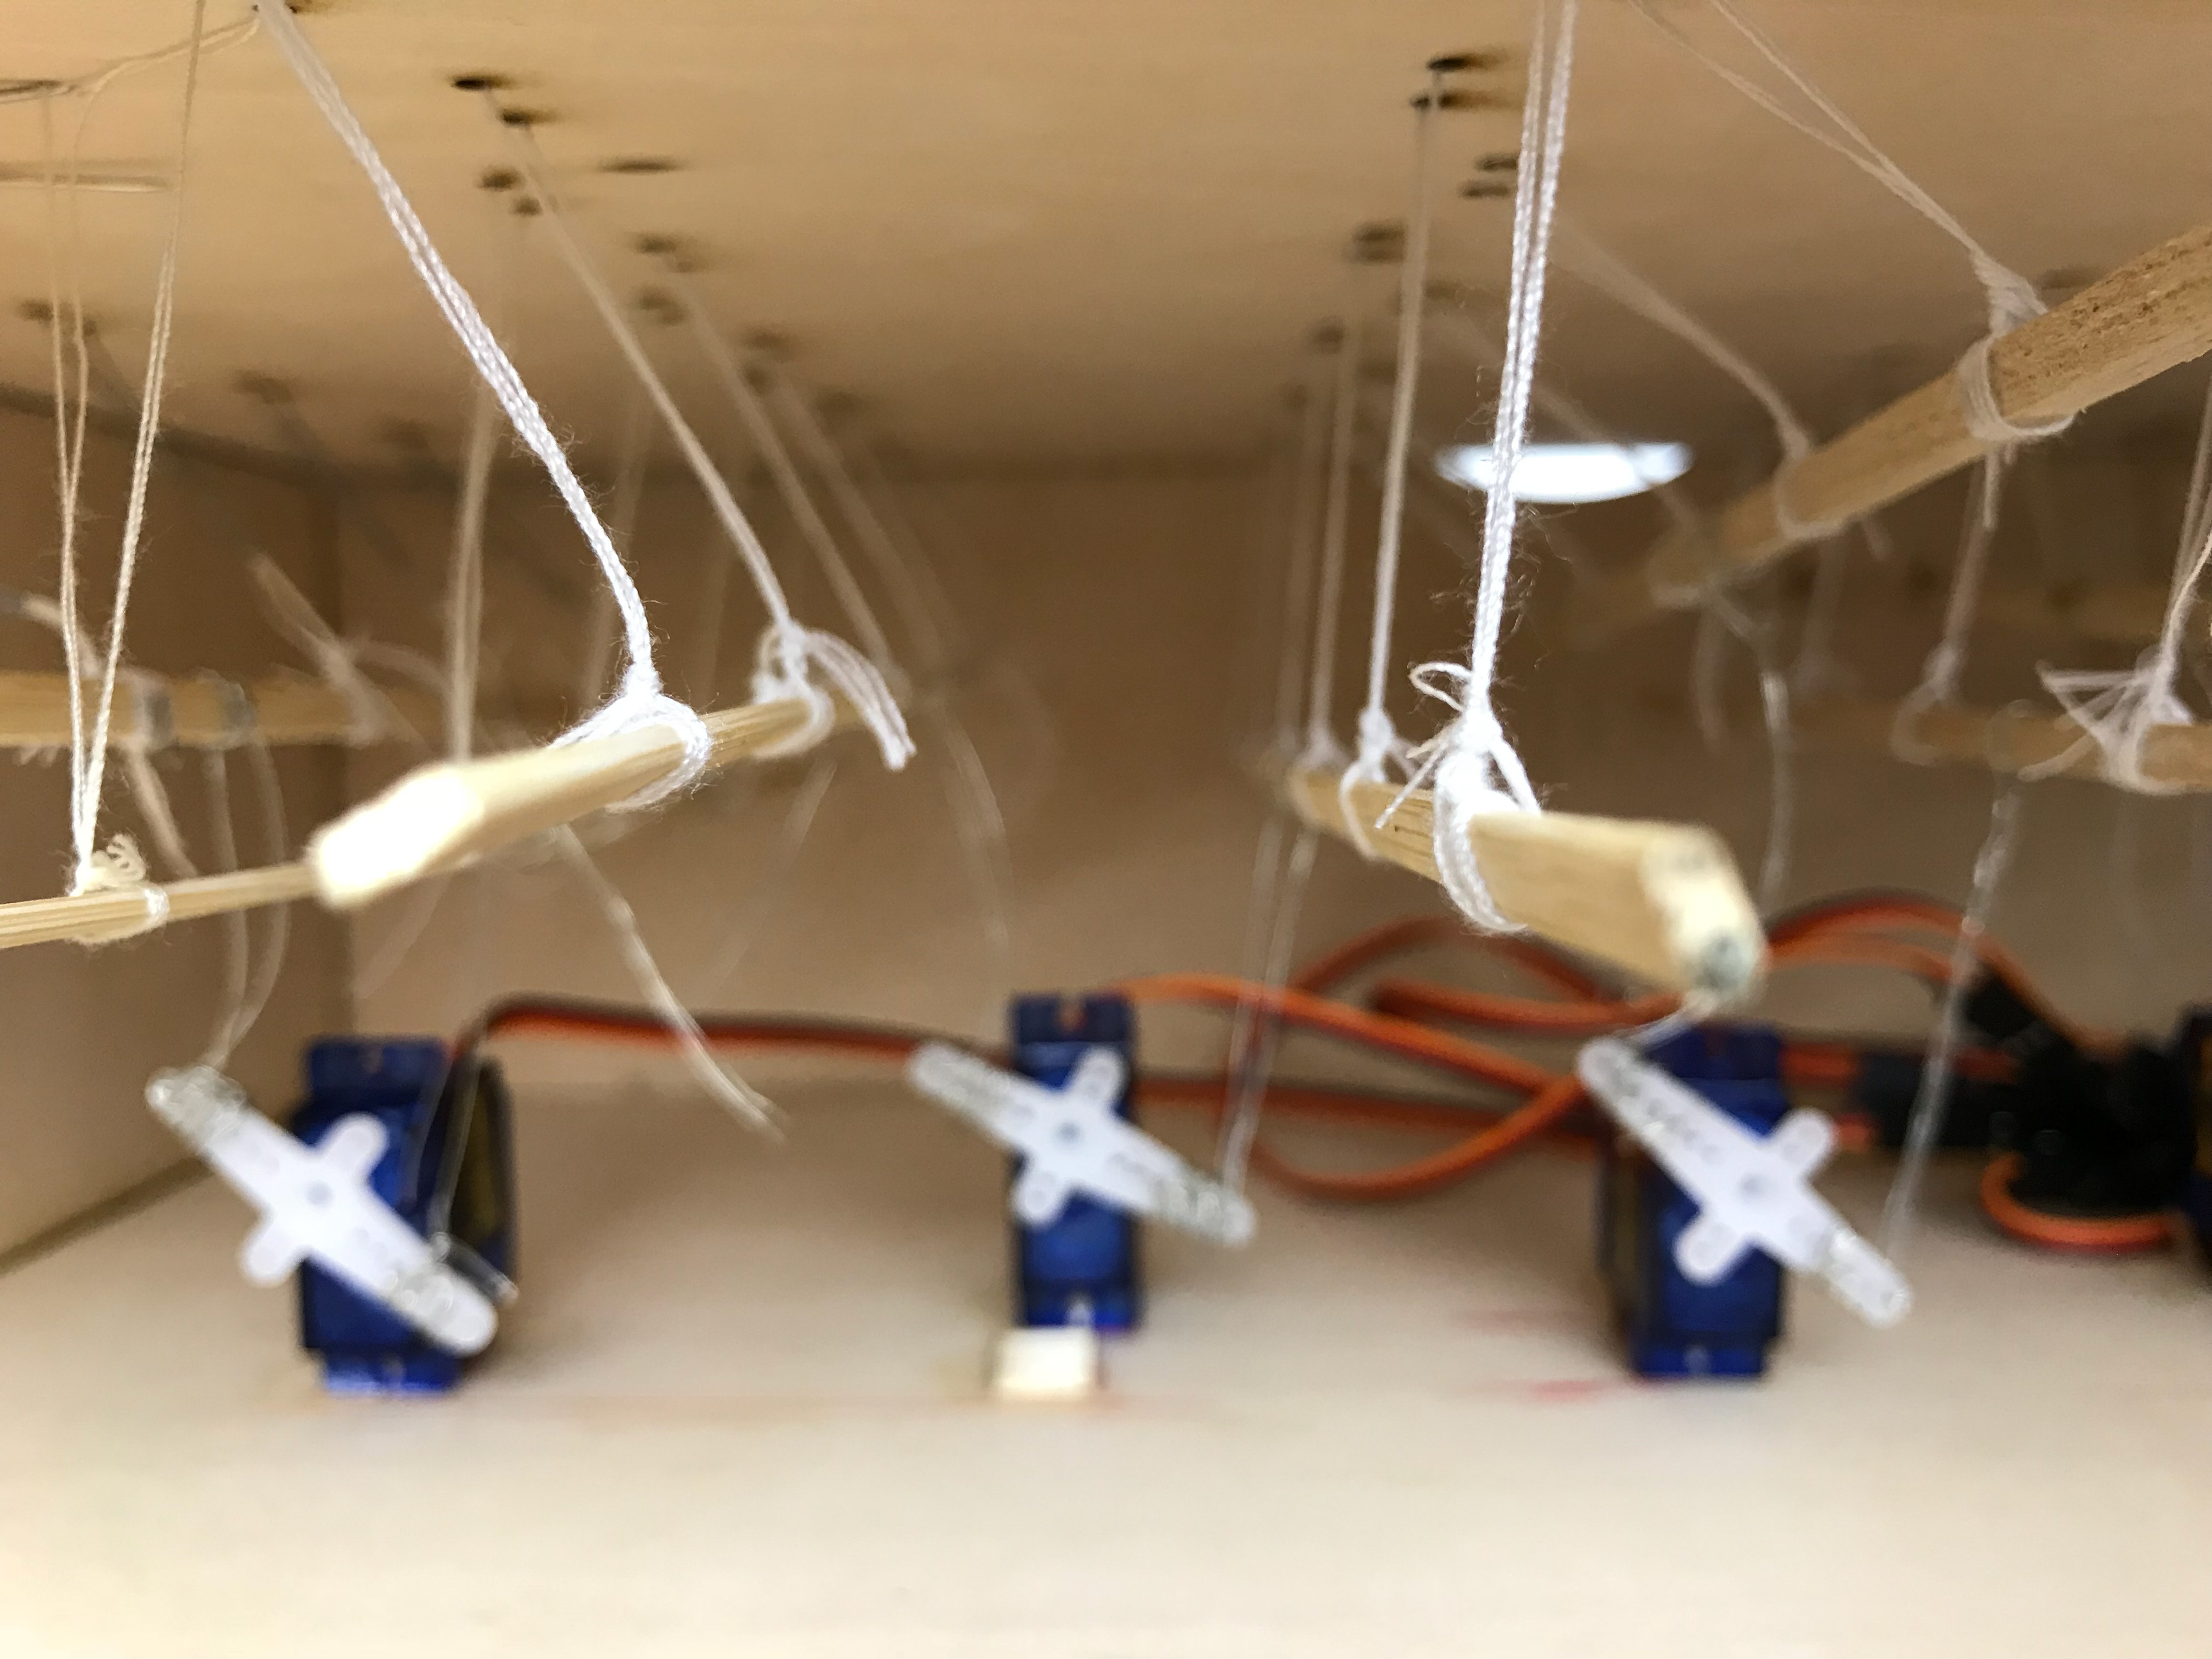
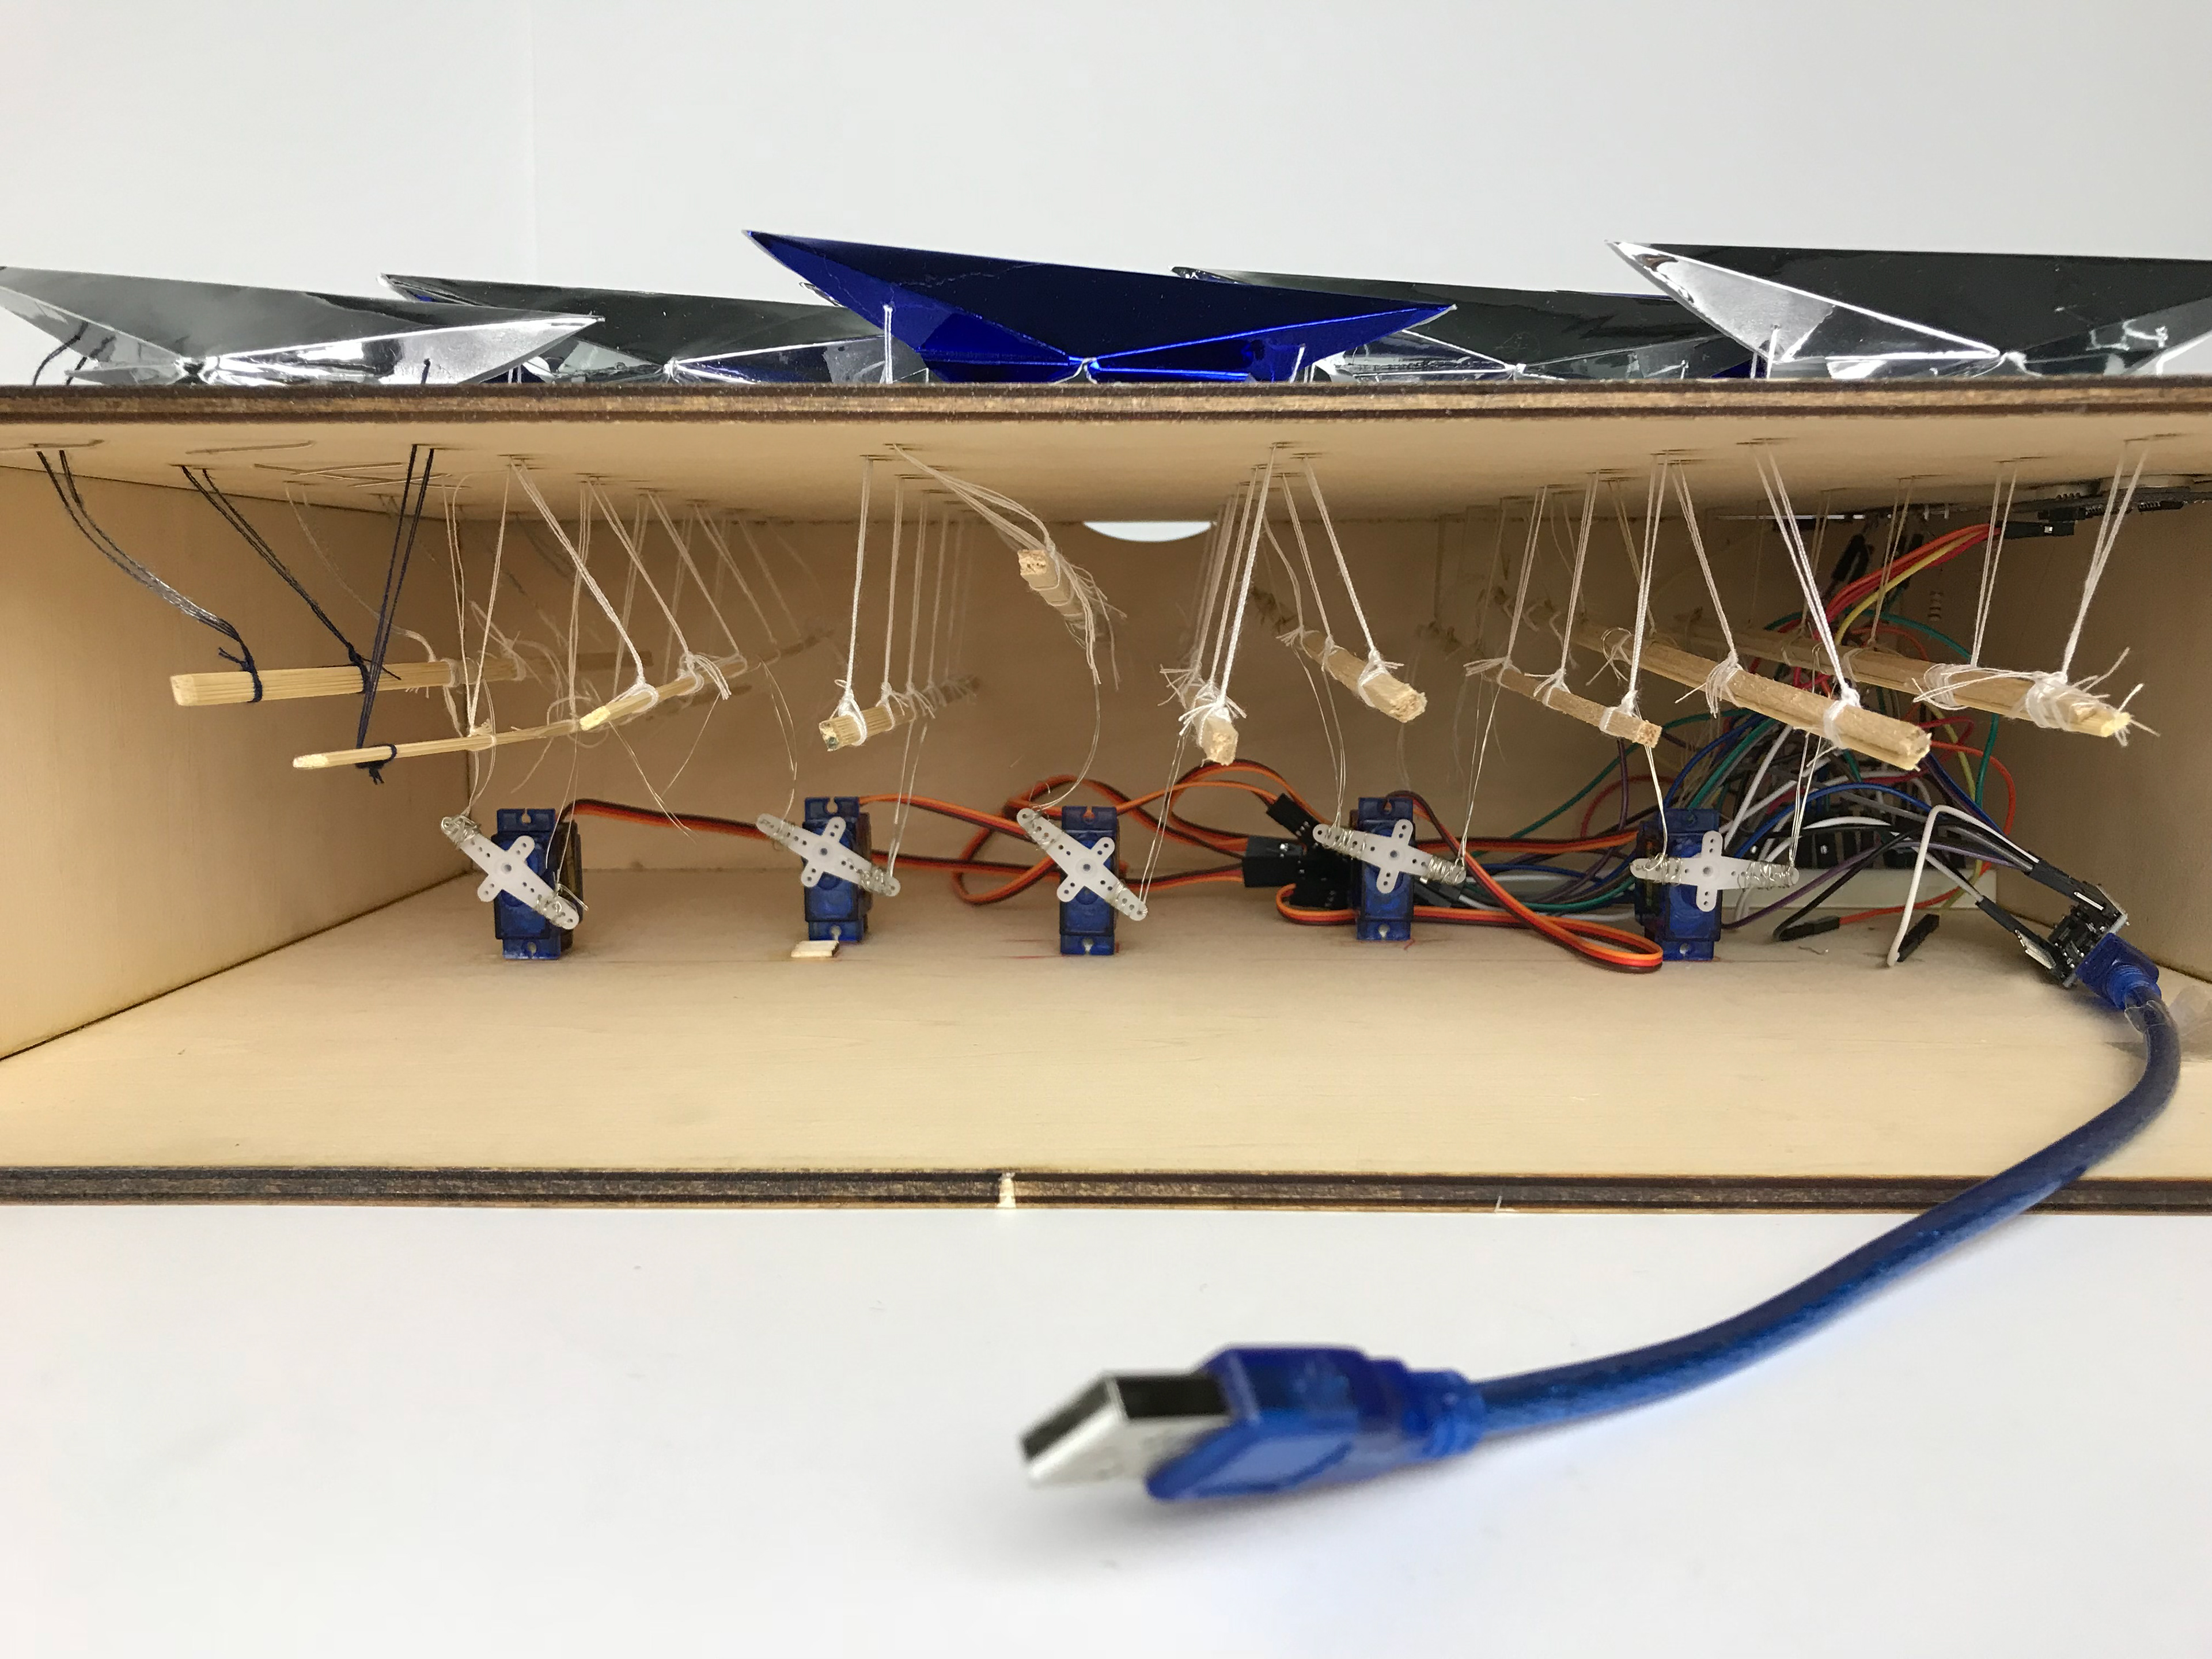
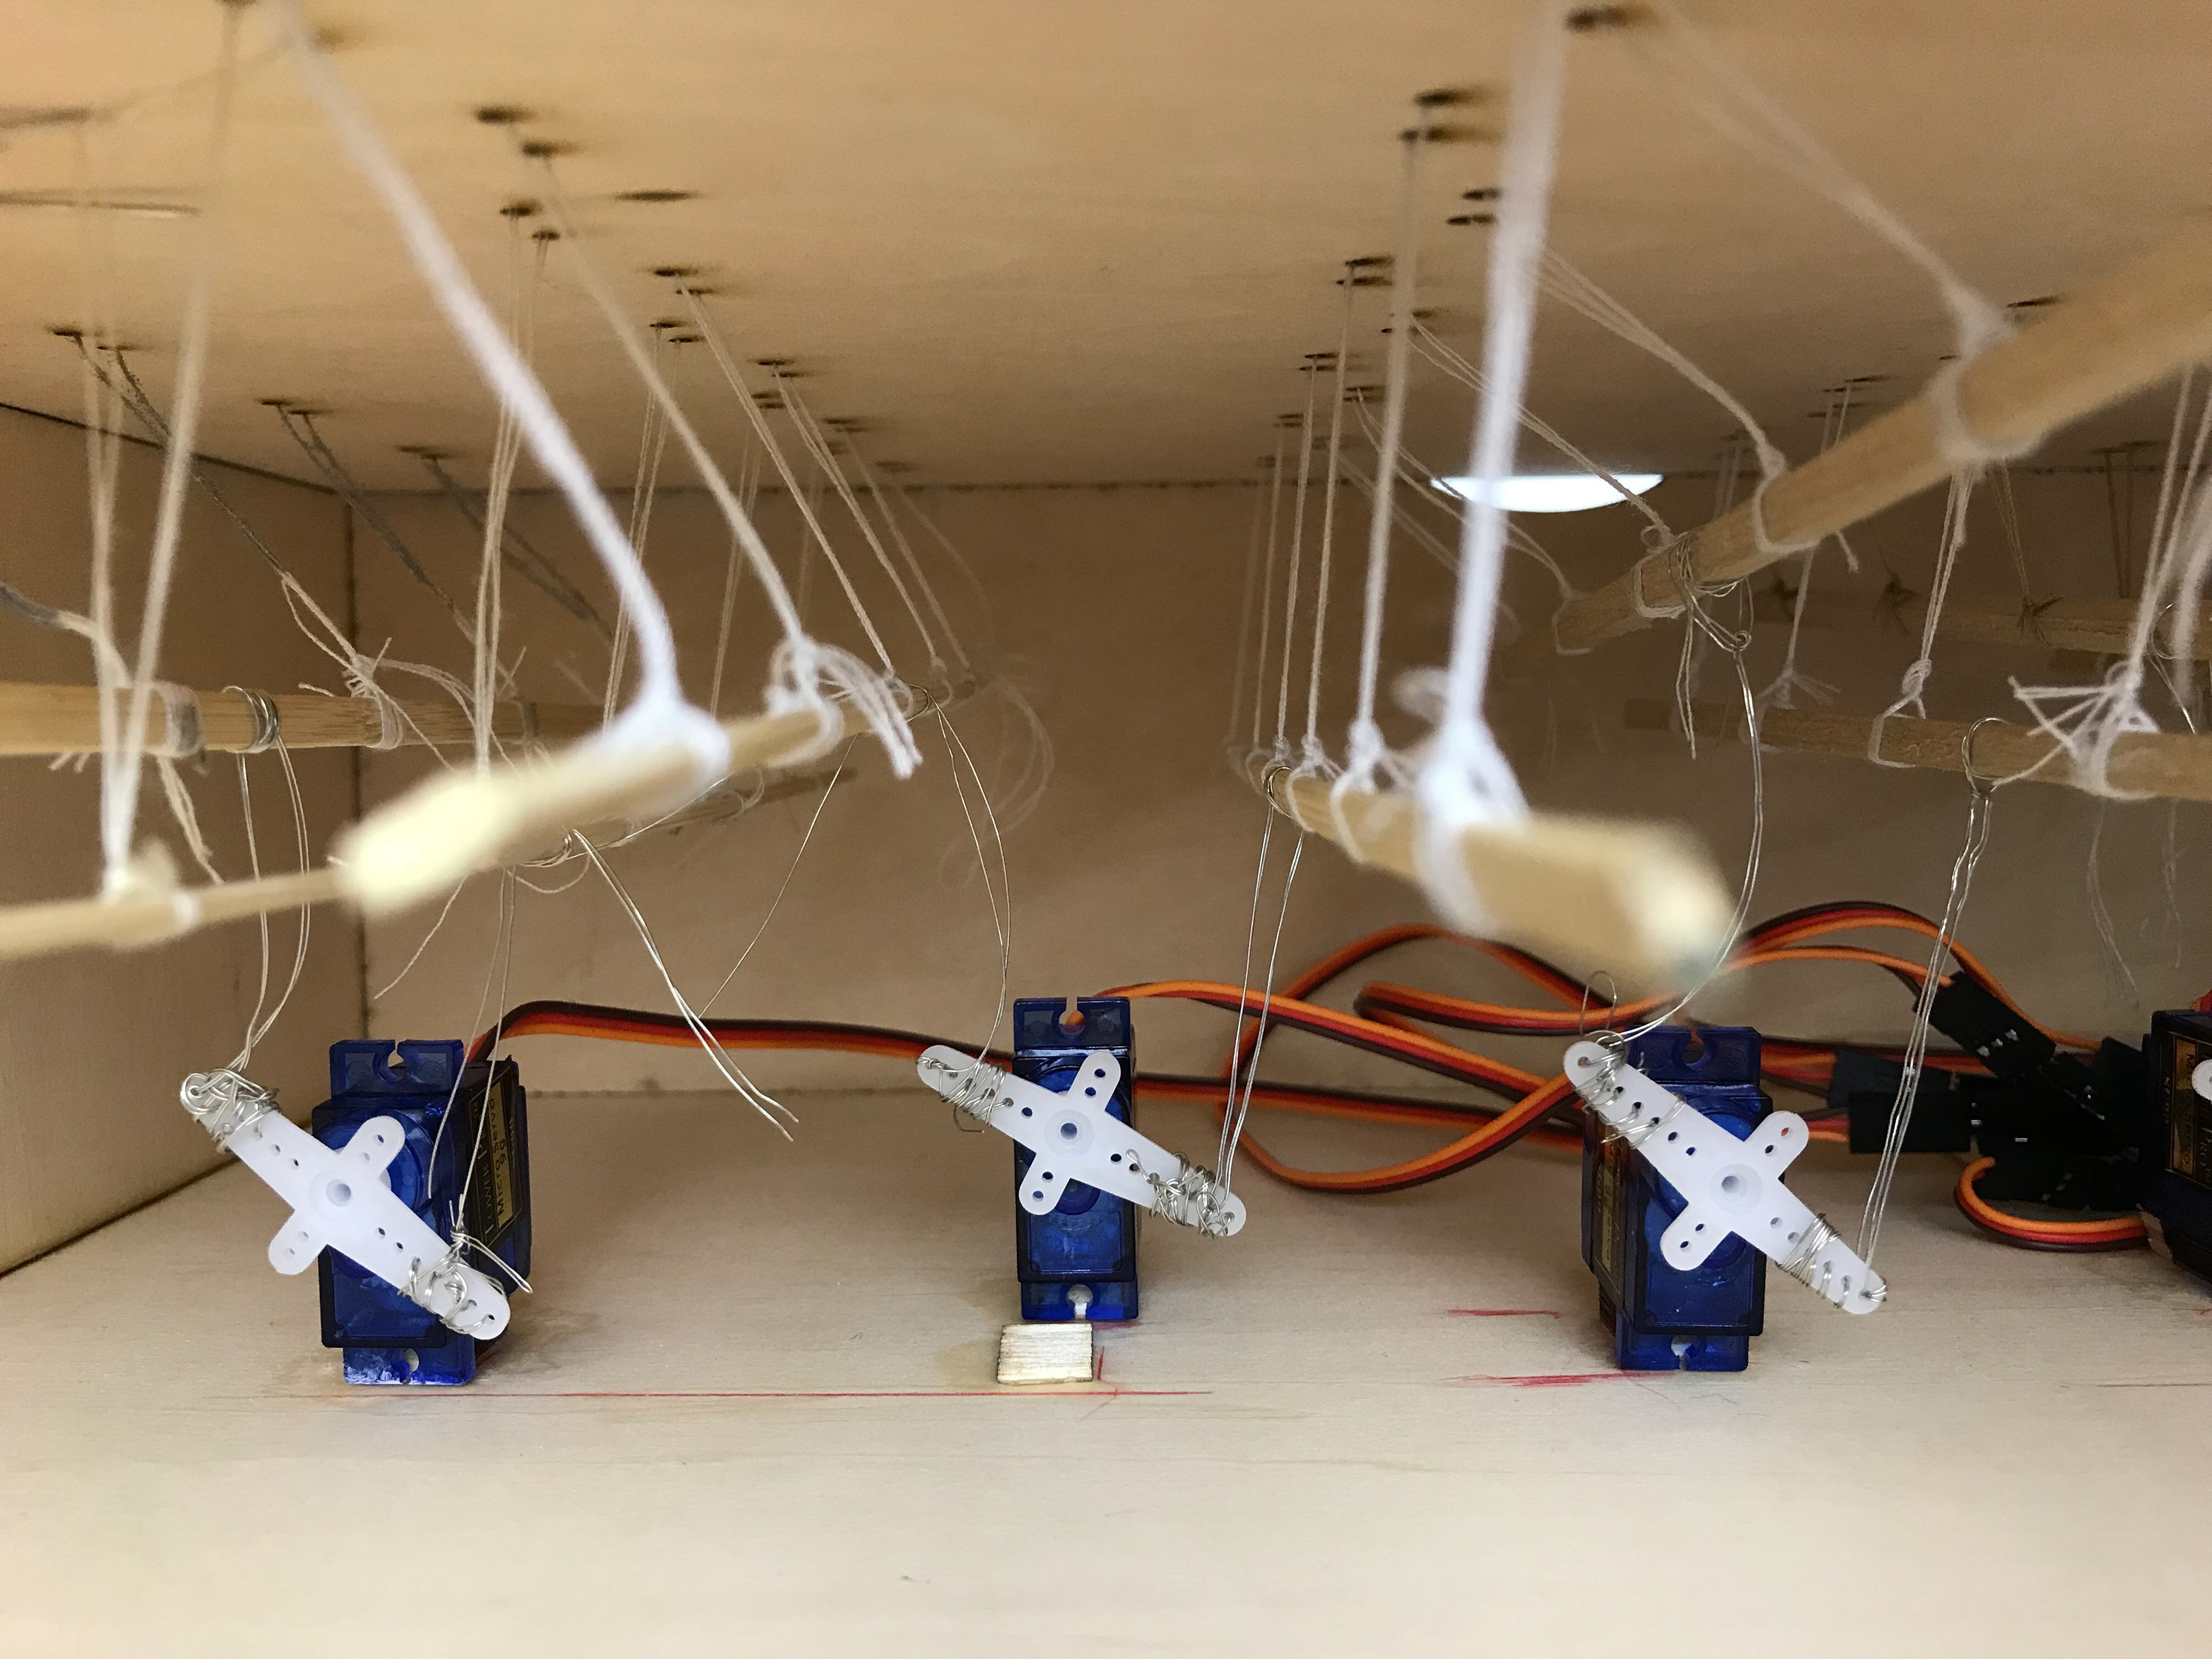
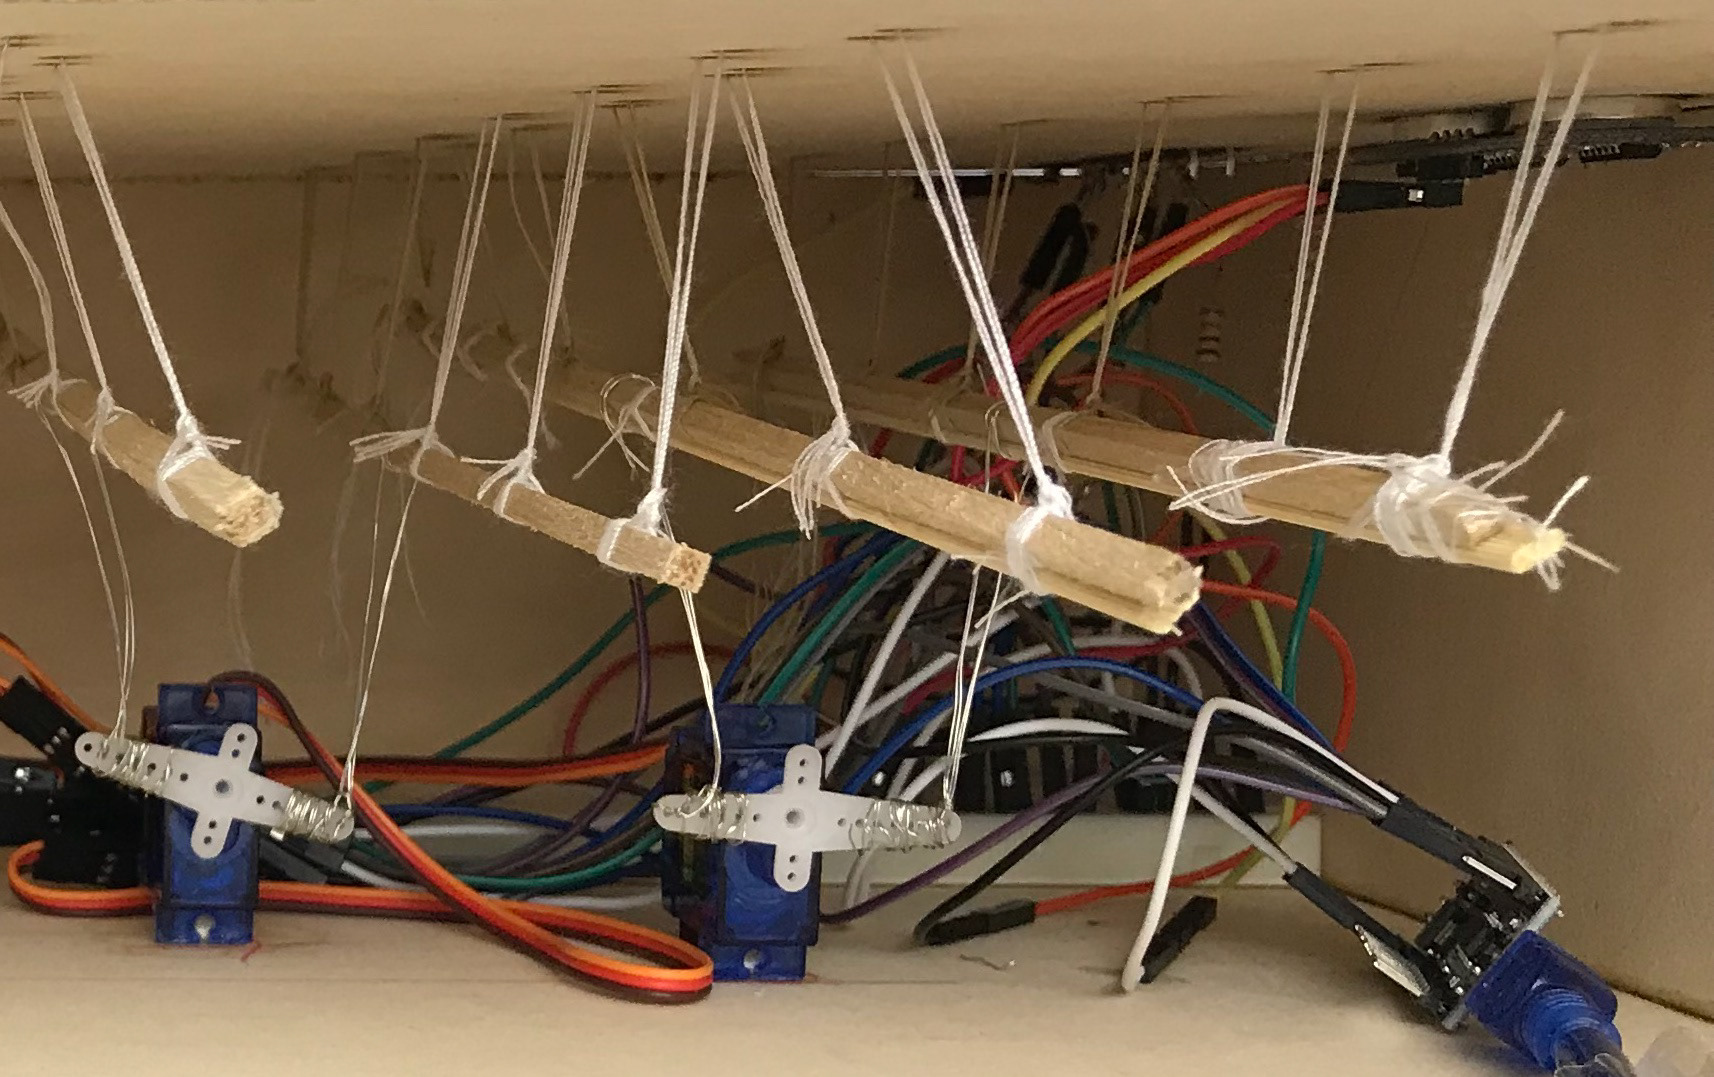
Attempts have been made to pull the wire with iron wire fixing unit, but iron wires may break the unit structure. So we finally determined to sew the sides of the unit structure with cotton threads. We passed the cotton thread through the four feet of the unit, each column is fixed on the horizontal wooden strips, and the wooden strips are fixed on the double blades of the steering gear by the wire, and the wire is pulled by the rotation of the steering wheel, thus pulling the cotton thread to make the overall movement.
3.3 Connection of circuits and Code debugging
According to the port set by the code, the components are connected in turn, and the movement speed of the servo is continuously adjusted to conform to the swing effect of the waves.
3.4 Product Box Making
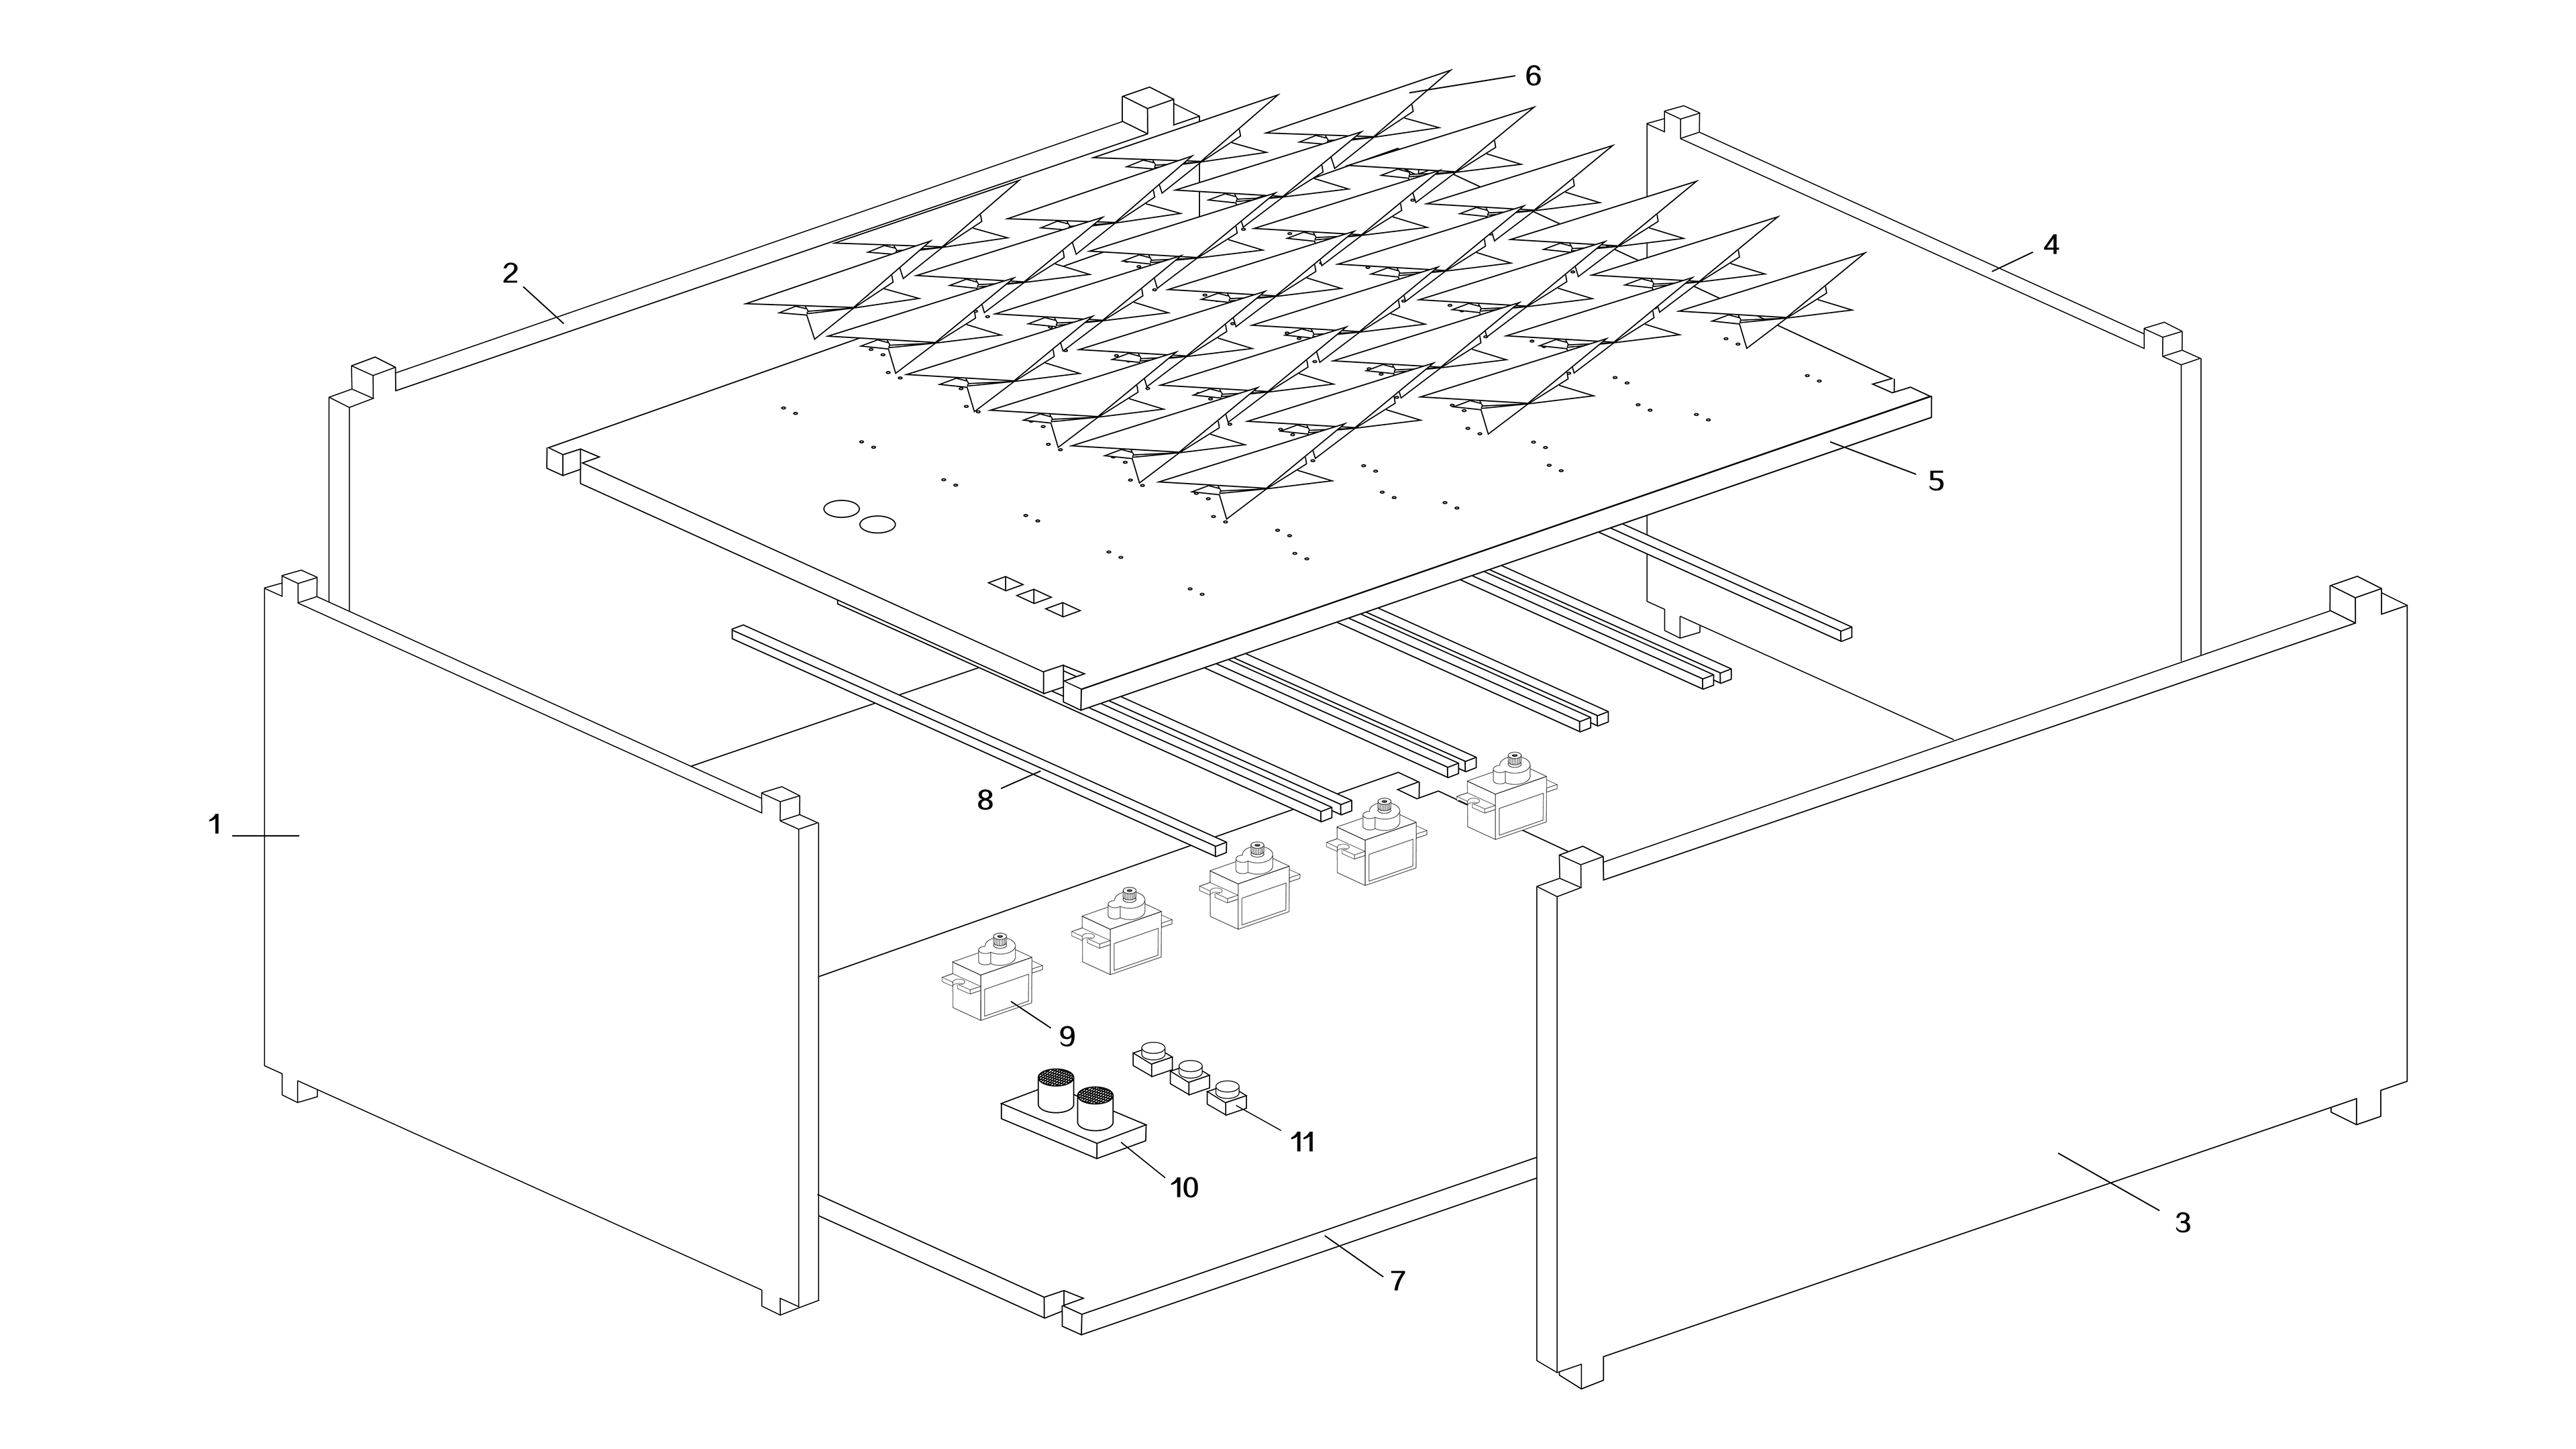
After drawing the cutting drawings, we cut the board with a laser cutter to make the outer box. There are 10 rows of small holes in the upper surface of the box, so that the cotton thread can pass through to connect units and the wood strip. 5 steering gears are fixed at the bottom of the box to drive the wooden strips up and down.
Three buttons and an ultrasonic distance sensor are installed on one side of the upper surface of the box for pressing and sensing.
After all the structures have been installed, we bonded and integrated all these into the box, and at the same time abandon the last board, so that we can open and adjust the structure inside.
4. Design Details
4.1 External details
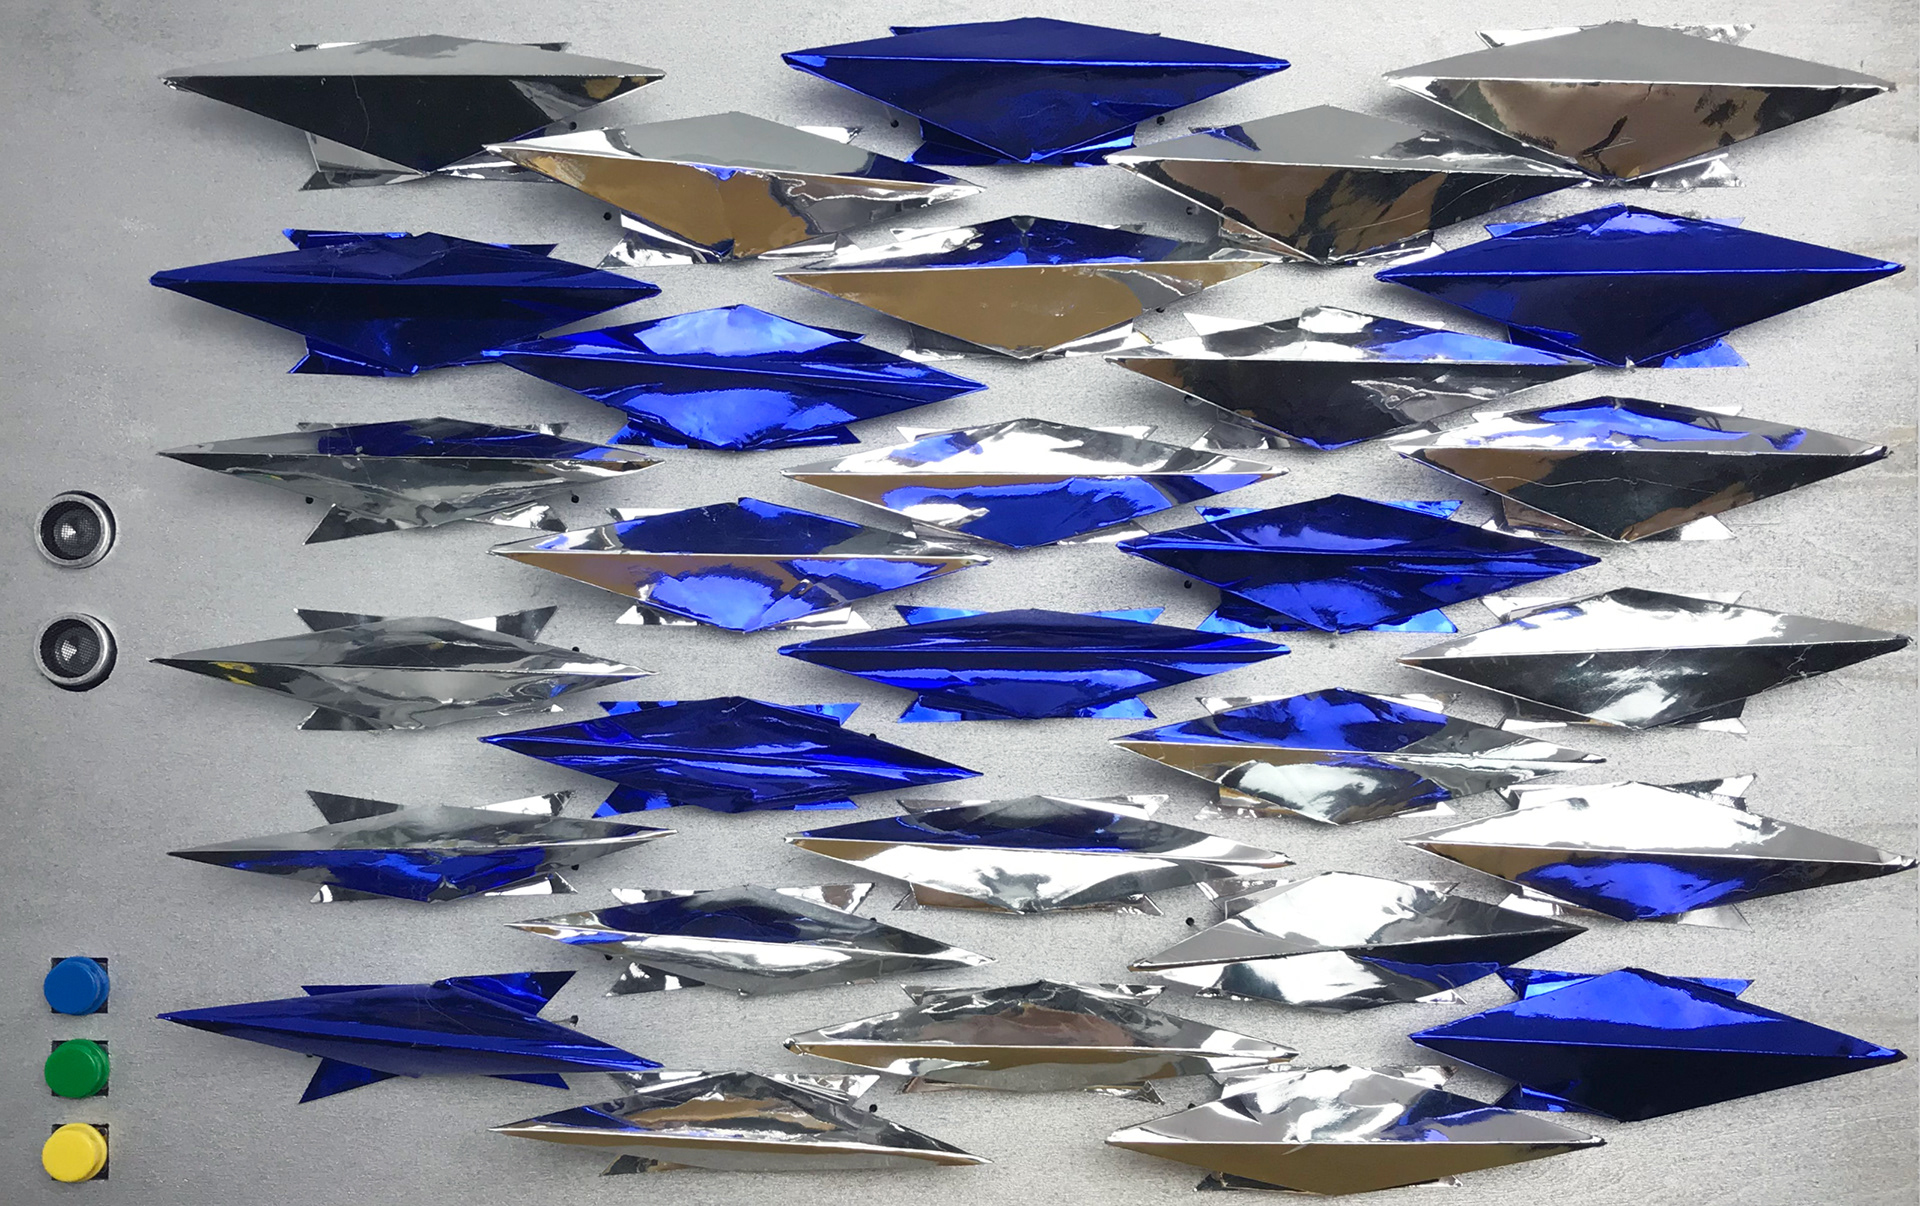
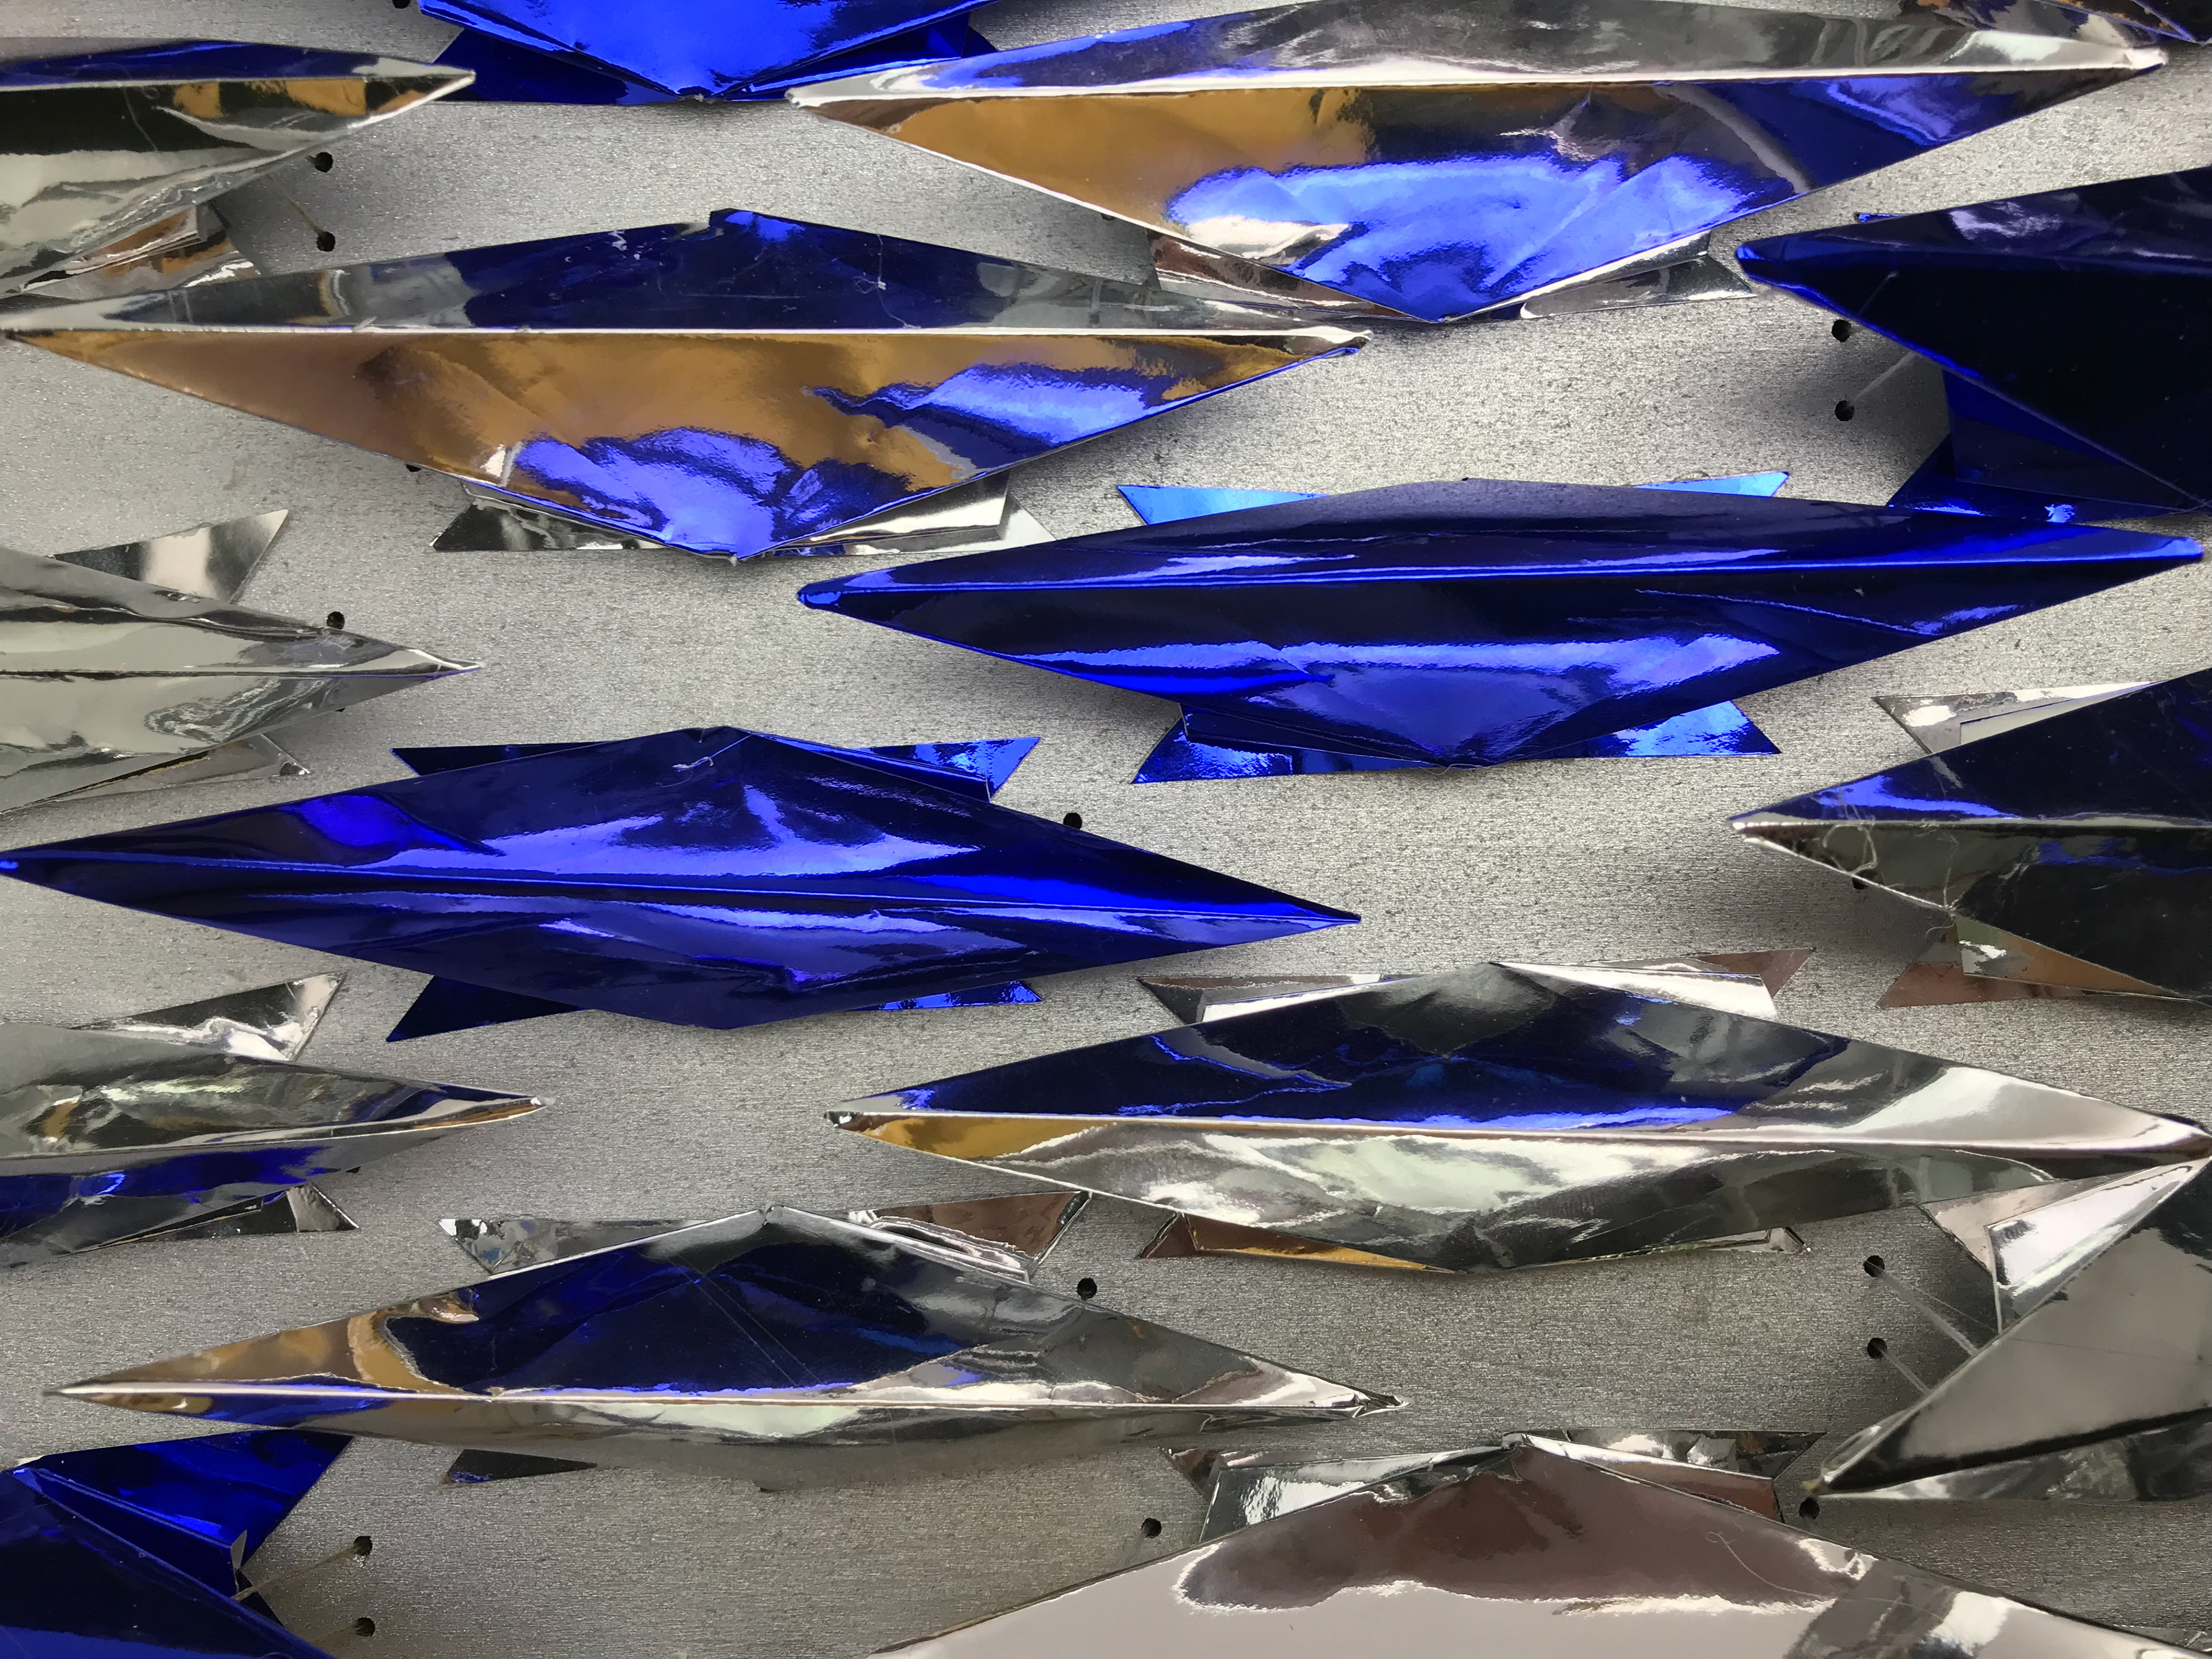
1) Each unit uses blue or silver reflective paper, in order to reflect the soft white light, and also produce reflection effects, which will complement each other and become variegated. The blue units are randomly distributed between the white units to create a random beauty.

2) The individual cells of each row are staggered with the adjacent rows of cells, saving space and creating a staggering movement.

3) The color of the box is also silver, which corresponds to the silver color of units, making the blue waves more prominent. In the distance, in the silvery waters, there are several blue waves swaying up and down, which is wonderful.
4) The color of the button is the same as the blue color, which is integrated with the overall color. The green and yellow colors, which are completely different from the blue, have become the embellishment in the overall design, jumping beyond the blue to form a lively and beautiful style.

5) The button and the ultrasonic distance sensor are arranged on the same side of the box, so that users can reach out and let the sensor perform distance sensing after selecting the mode.
4.2 Internal details
1) There are 10 rows of small holes distributed on the upper surface of the box. One side of each unit needs to be passed through 2 small holes with cotton thread. After that, the two cotton threads are tied to the horizontal wooden strips, and each two cotton lines are equidistantly distributed on the wooden strips.

2) The middle of each strip is tied to the blades of the steering gear by iron wires, and each of the two wooden strips is attached to a steering gear, so that the rotation of the steering wheel drives a whole row of single movements. The distribution of the 5 servos is not in a straight line, because the staggering of the individual causes the center to be misaligned.
3) The wires are integrated on one side in the box, which is not messy, and allows the button and ultrasonic distance sensor to be connected to the Arduino board more conveniently.
5. Final Design